
Unlocking Off-Grid Freedom: How to Choose an Ideal Campervan Solar Setup
Imagine waking up to the gentle hum of nature, far from the nearest power outlet, yet your coffee machine is brewing and your laptop is charged. This isn't a dream; it's the reality for thousands of van lifers empowered by solar energy, transforming their vehicles into true mobile homes.
But transitioning to this off-grid lifestyle comes with a crucial challenge: how do you design a reliable power system that meets all your needs without overspending or falling short? The sheer volume of options, technical jargon, and potential pitfalls can make the process feel overwhelming.
This guide will demystify the process, walking you through every essential consideration to help you confidently choose an ideal campervan solar setup. By the end, you'll possess the knowledge to design a system that powers your adventures for years to come, ensuring your freedom on the open road.
Understanding Your Power Needs: The Foundation of Any Solar System
Before you even think about panels or batteries, the absolute first step is to quantify your energy consumption. This isn't just a suggestion; it's the most critical factor determining the size and cost of your entire solar system. Underestimate, and you'll constantly run out of power. Overestimate significantly, and you'll waste money on oversized components.
Calculating Daily Energy Consumption
To accurately size your system, you need to list every electrical appliance you plan to use in your campervan. For each item, determine its wattage (usually found on the device itself or in its manual) and the approximate number of hours you'll use it per day. Multiply these two figures to get its daily Watt-hours (Wh).
- Example Appliances & Usage:
- Laptop: 60W x 4 hours = 240Wh
- LED Lights: 10W x 5 hours = 50Wh
- Water Pump: 50W x 0.5 hours = 25Wh
- Mini Fridge: 40W x 12 hours (compressor run time) = 480Wh
- Phone Charger: 10W x 2 hours = 20Wh
Sum up the Watt-hours for all your devices. This total is your estimated daily energy consumption. It's wise to add a 10-20% buffer for unexpected usage or efficiency losses. For instance, if your calculated daily consumption is 1000Wh, aim for a system that can comfortably produce 1100-1200Wh per day.
Future-Proofing Your Setup
Consider your long-term plans. Do you anticipate adding more power-hungry appliances like a microwave, an electric kettle, or a Starlink setup in the future? Building in a little extra capacity now can save you significant hassle and cost down the line. It's often more economical to install a slightly larger system initially than to upgrade components later. Also, factor in a few days of autonomy for cloudy weather or extended stays off-grid, meaning your battery bank should ideally store enough power for 2-3 days without sun.
Key Components of a Campervan Solar System
A complete campervan solar setup isn't just about the panels; it's an interconnected ecosystem of specialized components working in harmony. Understanding each part's role is crucial for making informed decisions.
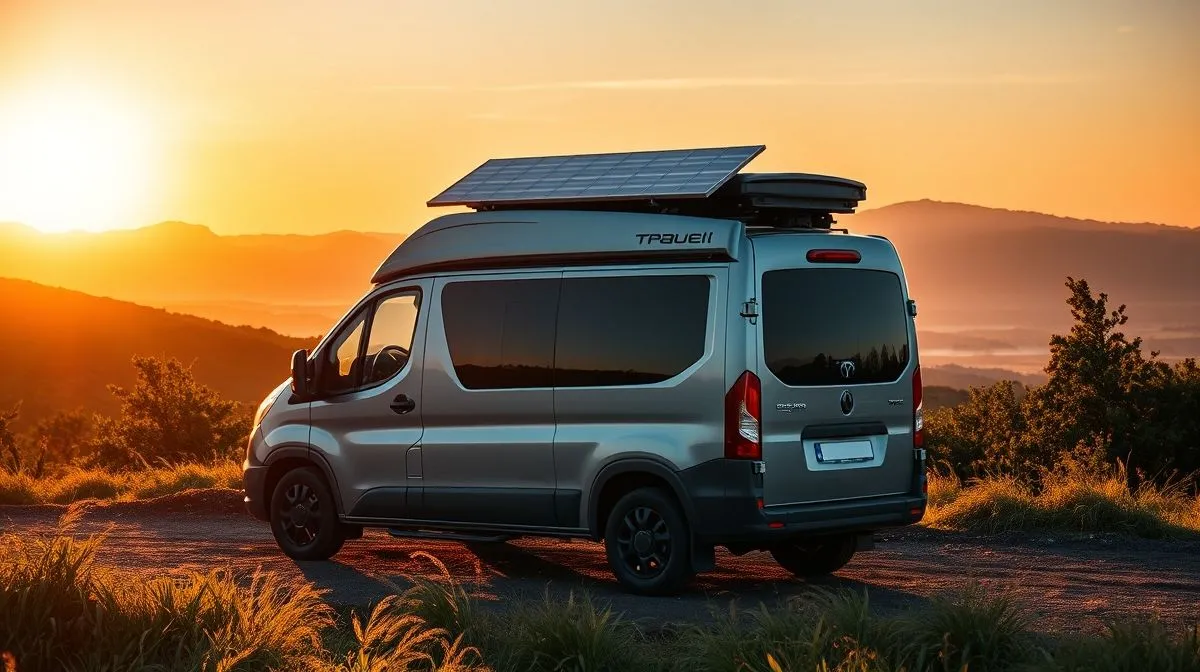
Solar Panels: Capturing the Sun's Energy
Solar panels are the collectors, converting sunlight into usable electricity. The two primary types for campervans are monocrystalline and polycrystalline.
- Monocrystalline Panels: These are typically more efficient (17-22%) and perform better in low-light conditions. They are made from single-crystal silicon, giving them a uniform dark appearance. While often more expensive per watt, their higher efficiency means you can get more power from a smaller footprint, which is invaluable on a campervan roof.
- Polycrystalline Panels: Made from multiple silicon crystals, they are slightly less efficient (15-17%) and have a mottled blue appearance. They are generally more affordable per watt, but you'll need more surface area to achieve the same power output as monocrystalline panels.
Consider also rigid vs. flexible panels. Rigid panels are durable and efficient, ideal for permanent installations. Flexible panels are lighter, can conform to curved surfaces, and are easier to install, but often have a shorter lifespan and lower efficiency.
Batteries: The Heart of Your Power Storage
Your battery bank stores the energy generated by your solar panels, allowing you to use power when the sun isn't shining. This is arguably the most critical and often most expensive component.
- Lead-Acid Batteries (AGM, Gel): These are traditional, more affordable options. AGM (Absorbed Glass Mat) batteries are sealed, maintenance-free, and can be mounted in various positions. Gel batteries are similar but often have a lower charge rate. Both have a shallower depth of discharge (DoD), typically 50%, meaning you shouldn't regularly drain them below half their capacity to prolong their life.
- Lithium-Ion Batteries (LiFePO4): Lithium Iron Phosphate (LiFePO4) batteries are the modern standard for campervan setups. They are significantly lighter, have a much higher DoD (typically 80-100%), a longer cycle life (thousands of cycles vs. hundreds for lead-acid), and can be discharged and recharged rapidly. While the initial cost is higher, their longevity and superior performance often make them more cost-effective in the long run. Learn more about the differences and benefits of various battery types from reputable sources like Battle Born Batteries' comprehensive guide.
When choosing, consider the battery's Ah (Amp-hour) capacity, which indicates how much energy it can store. This needs to align with your daily consumption and desired autonomy.
Charge Controllers: Protecting Your Investment
The charge controller is the brain of your solar system. It regulates the voltage and current coming from your solar panels to your batteries, preventing overcharging and ensuring optimal charging efficiency. This prolongs battery life and prevents damage.
- PWM (Pulse Width Modulation) Controllers: These are simpler and less expensive. They essentially reduce the panel's voltage to match the battery's voltage, but in doing so, they can waste some of the available power, especially in cooler conditions.
- MPPT (Maximum Power Point Tracking) Controllers: MPPT controllers are more advanced and efficient. They actively track the maximum power point of the solar array, optimizing the voltage and current to extract significantly more power from your panels (10-30% more than PWM). For most campervan setups, especially with higher wattage panels, an MPPT controller is the recommended choice due to its superior efficiency.
Inverters: Converting DC to AC Power
Most campervan appliances run on 12V DC power (e.g., lights, fans, USB chargers). However, many common household items like laptops, blenders, or microwaves require 120V AC power. An inverter converts the DC power from your batteries into AC power.
- Pure Sine Wave Inverters: These produce a clean, smooth AC waveform, identical to grid power. They are essential for sensitive electronics (laptops, medical devices) and inductive loads (motors, refrigerators), preventing damage and ensuring efficient operation. They are more expensive but highly recommended.
- Modified Sine Wave Inverters: These produce a stepped, blocky AC waveform. While cheaper, they can cause issues with sensitive electronics, create buzzing noises, and operate less efficiently. Avoid them for anything beyond basic resistive loads like heating elements.
When sizing your inverter, consider the peak wattage of the appliances you'll run simultaneously. Always choose an inverter with a continuous wattage rating that exceeds your anticipated peak load.
Wiring and Safety Components
Proper wiring and safety components are paramount for efficiency and, more importantly, for preventing fires and electrical hazards. This includes appropriately sized wires (wire gauge), fuses, and circuit breakers to protect against overcurrents and short circuits. A battery monitor is also highly recommended to track your battery's state of charge, voltage, and current flow, giving you crucial insights into your power system's health.
Sizing Your Solar System: A Step-by-Step Approach
Once you've calculated your daily energy needs and understand the components, the next step is to accurately size each part of your system. This ensures everything works together efficiently.
Determining Solar Panel Wattage
Your solar panel array needs to generate enough power to meet your daily consumption. The general formula is:
Required Panel Watts = (Daily Watt-hours) / (Peak Sun Hours)
Peak Sun Hours (PSH) refers to the average number of hours per day when solar irradiance averages 1,000 watts per square meter. This varies significantly by location and season. For example, in summer, you might get 5-7 PSH, while in winter, it could drop to 2-3 PSH. Always use the lowest PSH for the time of year and location you expect to be using your van most frequently.
It's also crucial to add a buffer for system losses (e.g., wiring, temperature, dust, inverter inefficiency), typically 20-30%. So, the refined formula becomes:
Required Panel Watts = (Daily Watt-hours * 1.2 to 1.3) / (Peak Sun Hours)
For example, if you need 1000Wh per day and have 4 peak sun hours, you'd need (1000Wh * 1.2) / 4 PSH = 300W of solar panels. If you want to choose an ideal campervan solar setup for year-round use, plan for those lower winter sun hours.
Battery Bank Sizing
Your battery bank needs to store your daily consumption and provide a buffer for cloudy days. The formula for battery capacity (in Amp-hours, Ah) is:
Battery Ah = (Daily Watt-hours * Days of Autonomy) / (Battery Voltage) / (Usable Depth of Discharge)
For a 12V system and aiming for 2 days of autonomy with LiFePO4 batteries (80% DoD):
Battery Ah = (1000Wh * 2 days) / 12V / 0.80 = 208 Ah
So, you'd need at least a 200Ah 12V LiFePO4 battery. If using lead-acid (50% DoD), you'd need significantly more capacity. Always round up to the nearest available battery size.
Matching Components for Optimal Performance
Ensure your charge controller can handle the maximum current from your solar panels (Panel Max Current = Panel Watts / Panel Voltage). Your inverter's continuous wattage rating must exceed the maximum combined wattage of all AC appliances you plan to run simultaneously. Proper component matching prevents bottlenecks and ensures the longevity and efficiency of your entire system.
Installation Considerations and Best Practices
A well-designed system is only as good as its installation. Poor installation can lead to inefficiencies, component failure, and dangerous electrical hazards. Taking the time to install correctly pays dividends in reliability and safety.
Panel Placement and Mounting
The roof of your campervan is the most common place for solar panels. Aim for a location that maximizes sun exposure throughout the day and minimizes shading from roof vents, skylights, or air conditioners. Rigid panels are typically mounted on sturdy brackets, often tilted for better sun angle, while flexible panels can be glued directly to the roof. Ensure mounts are securely fastened to the van's frame, not just the roof skin, to withstand driving vibrations and wind.
Wiring and Connections
Use appropriate wire gauge for all connections, ensuring it can handle the maximum current without excessive voltage drop or overheating. DC wiring from panels to the charge controller and from the controller to the battery should be robust. AC wiring from the inverter to your outlets also needs to be correctly sized. All connections should be clean, secure, and properly crimped (not soldered for high-current applications). Use weather-resistant connectors (like MC4 connectors for solar panels) for outdoor runs.
Safety First: Fuses, Breakers, and Ventilation
This cannot be stressed enough: every major component and circuit in your solar system must be protected by fuses or circuit breakers. This includes:
- Between solar panels and charge controller.
- Between charge controller and battery.
- Between battery and inverter.
- For each DC and AC load circuit.
Fuses and breakers protect your wiring and equipment from overcurrents and short circuits, which can lead to overheating and fire. Additionally, ensure your battery bank, especially if it's lead-acid, is in a well-ventilated area to dissipate any gasses. Proper grounding of your system is also critical for safety. For detailed electrical safety guidelines, consult resources from organizations like the National Fire Protection Association (NFPA) or specific RV electrical codes.
Common Mistakes to Avoid When Building Your Solar Setup
Even with careful planning, it's easy to fall into common traps. Being aware of these pitfalls can save you time, money, and frustration.
- Underestimating Power Needs: This is the most frequent mistake. People often forget small devices or don't account for daily variations in usage. Always err on the side of slightly overestimating your needs.
- Skimping on Battery Quality: The battery bank is the backbone of your system. Cheaper, lower-quality batteries will degrade quickly, leading to premature replacement and poor performance. Invest in the best batteries you can afford, especially LiFePO4.
- Ignoring Proper Wiring and Fusing: Undersized wires lead to voltage drop and heat, while a lack of fuses or incorrect sizing creates serious fire hazards. Never cut corners on safety components.
- Not Accounting for Shade or Cloudy Days: Even partial shading on one panel can significantly reduce the output of an entire array, especially if wired in series. Plan for a buffer of battery capacity to handle periods of low sun.
- Overlooking Maintenance: Solar panels need occasional cleaning to remove dirt and debris that can reduce efficiency. Battery terminals should be checked for corrosion, and system components should be periodically inspected.
Real-World Scenarios and Practical Tips
Let's look at how these principles apply to different campervan use cases, helping you visualize how to choose an ideal campervan solar setup for your specific adventures.
Small Setup: The Weekend Warrior
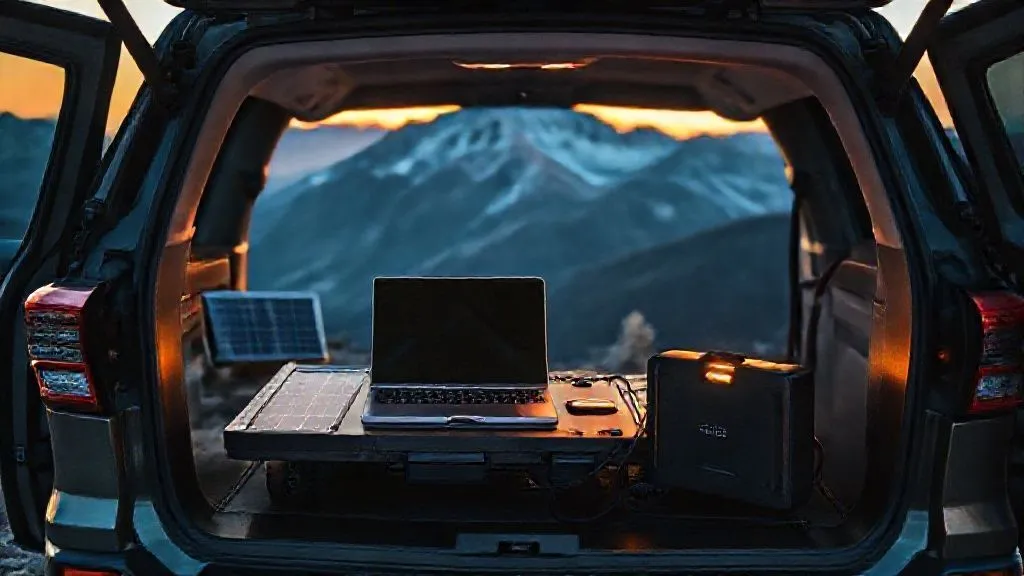
For those who primarily use their van for weekend trips, an occasional overnight stay, or only need to charge small devices and run basic lights, a modest setup might suffice. This could involve 100-200W of solar panels and a 100-200Ah AGM or small LiFePO4 battery. The focus here is on simplicity and minimal cost, providing enough power for short bursts of off-grid living without heavy appliance use.
Medium Setup: The Part-Time Van Lifer
If you're spending weeks or months on the road, working remotely, or running a small fridge, a more robust system is necessary. This typically means 300-500W of solar panels and 200-400Ah of LiFePO4 batteries. An MPPT charge controller and a pure sine wave inverter become essential to handle sensitive electronics and ensure efficient power conversion for sustained use.
Large Setup: The Full-Time Off-Grider
For true full-time van lifers who rely entirely on their system for all power needs, including high-draw appliances like microwaves, induction cooktops, or powerful air conditioning units, a large-scale system is required. This often involves 600W+ of solar panels, 400Ah+ of LiFePO4 batteries, a high-capacity MPPT controller, and a large pure sine wave inverter (2000W+). Integrating a secondary charging source, like a DC-to-DC charger from the alternator, is also common for redundancy.
Practical Tips for All Setups:
- Monitor Your System: Install a reliable battery monitor. Knowing your battery's state of charge, current draw, and historical data empowers you to manage your power effectively and avoid deep discharges.
- Optimize Appliance Usage: Whenever possible, use 12V DC appliances directly. Running AC appliances through an inverter incurs efficiency losses. Consider efficient appliances designed for RVs.
- Regular Cleaning: Keep your solar panels clean. Dust, dirt, leaves, and even bird droppings can significantly reduce their output. A quick wipe-down can restore lost efficiency.
- Consider Redundancy: For critical power needs, consider adding a portable solar panel or a DC-to-DC charger to supplement your main system.
Frequently Asked Questions (FAQ)
Can I use household solar panels on my campervan? While technically possible, household panels are typically larger, heavier, and designed for fixed installations, making them less practical for mobile applications. Campervan-specific panels are usually more compact and robust for vehicle use.
How long do campervan solar setups last? Solar panels can last 20-25 years. LiFePO4 batteries typically last 10-15 years or more (3,000-5,000+ cycles), while lead-acid batteries last 3-7 years (300-1,000 cycles). Charge controllers and inverters generally have a lifespan of 5-10 years, depending on quality and usage.
Is DIY installation safe, or should I hire a professional? DIY installation is feasible for those with electrical knowledge and a commitment to safety. However, if you're unsure, hiring a qualified RV electrician or solar installer is highly recommended. Incorrect wiring can be dangerous and costly.
What's the impact of temperature on solar panel performance? Solar panels are rated at a standard test temperature (STC) of 25°C (77°F). Their efficiency decreases slightly as temperatures rise above this, and increases slightly in colder temperatures. This effect is usually minor for typical operating ranges.
Can I charge my campervan battery from the alternator too? Yes, integrating a DC-to-DC charger allows your vehicle's alternator to charge your house batteries while driving. This is an excellent way to supplement your solar charging, especially on cloudy days or when driving long distances.
Recommended Reading
- Solo Female Foodie? Best Street Food Cities Await Your Taste Buds!
- Maldives Celebrity Hotspots: Where Do Stars Escape?
- Unlock Your City Break: Maximize Sightseeing & See More!
- Wellness Travel for Stress: Your Ultimate Unwinding Guide
- The Ultimate Guide: What to Pack for Baby's First International Trip
Conclusion
Embarking on the journey of powering your campervan with solar energy is a significant step towards true off-grid independence. By meticulously calculating your power needs, understanding the crucial role of each component, and carefully sizing your system, you lay the groundwork for a reliable and efficient power solution. Remember, investing in quality components and prioritizing safety during installation are non-negotiable for long-term success.
With the knowledge gained from this guide on how to choose an ideal campervan solar setup, you are now equipped to make informed decisions. Go forth, design your perfect system, and enjoy the unparalleled freedom and self-sufficiency that a well-designed campervan solar setup provides, wherever the road may take you.


Your email address will not be published. Required fields are marked *