
How to Capture Razor-Sharp Train Motion in Challenging Low Light Conditions?
For over two decades, I've chased the steel beasts of the rails across continents, from the misty Scottish Highlands to the bustling Tokyo bullet train lines. In that time, I've seen countless photographers, myself included, grapple with the elusive challenge of freezing a speeding locomotive in the gloom. It's a common pitfall: the desire for dramatic low-light shots often clashes with the technical demands of capturing crisp, motion-free images.
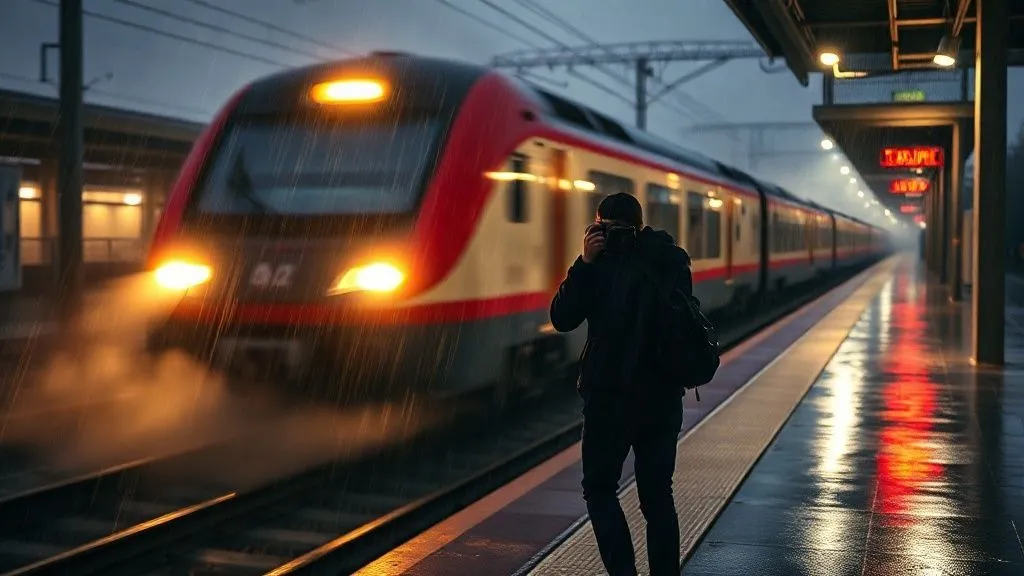
The bane of every railway photographer, especially at dawn, dusk, or deep into the night, is the dreaded motion blur that turns majestic trains into ghostly streaks, or the excessive noise that renders intricate details into a grainy mess. You want that iconic shot – the train slicing through the darkness, lights blazing, every rivet and every passenger car detail perfectly defined – but the camera seems to conspire against you, producing only soft, indistinct results.
This guide distills decades of experience into actionable frameworks and expert insights, empowering you to conquer the darkness and consistently produce stunning, razor-sharp train motion photographs. We'll explore not just camera settings, but also advanced techniques, essential gear, and crucial safety considerations, ensuring you leave with not just theory, but practical mastery of low-light railway photography.
Mastering Your Gear: The Low Light Arsenal
Before we even touch a setting, understanding your equipment is paramount. In low light, your gear isn't just a tool; it's an extension of your vision, and selecting the right components can make or break your shot.
The Camera Body: Full-Frame Advantage
While modern APS-C and Micro Four Thirds cameras have made incredible strides, a full-frame DSLR or mirrorless camera often holds a significant edge in low-light conditions. Their larger sensors boast superior ISO performance, meaning less digital noise at higher sensitivities. This allows you to push your ISO further without sacrificing image quality, giving you more flexibility with shutter speed and aperture.
Lenses: Fast and Furious
Your lens choice is arguably more critical than your camera body in low light. You need 'fast' lenses – those with wide maximum apertures like f/2.8, f/1.8, or even f/1.4. A wider aperture allows more light to hit the sensor in a shorter amount of time, enabling faster shutter speeds to freeze motion, or lower ISOs to reduce noise. Look for prime lenses (fixed focal length) as they often have wider apertures and sharper optics than zooms at comparable prices. A good 70-200mm f/2.8 zoom is a workhorse for railway photography, offering both reach and speed.
Tripods and Monopods: Stability is King
Even with fast lenses, a sturdy tripod is non-negotiable for low-light work, especially if you're experimenting with slower shutter speeds for light trails or precise framing. It eliminates camera shake, ensuring maximum sharpness. For more dynamic situations where you need to move quickly, a monopod offers a good compromise between stability and portability. Always use a remote shutter release or your camera's self-timer (2-second delay) to avoid any vibration when pressing the shutter button.

Shutter Speed & Aperture: The Motion-Stopping Dance
This is where the magic happens, or fails to. Balancing shutter speed and aperture is the core challenge when trying to capture razor-sharp train motion in low light.
Shutter Speed: Freezing the Moment
To freeze fast-moving trains, you need a fast shutter speed. There's no single 'magic number,' as it depends on the train's speed, its distance from you, and your focal length. As a general rule, I start at 1/500th of a second and adjust upwards. For very fast trains or close-up shots, you might need 1/1000th or even faster. The faster the train, the faster your shutter needs to be to prevent motion blur. Remember, in low light, achieving these speeds requires compromises elsewhere, usually ISO or aperture.
Aperture: The Light Funnel and Depth Control
In low light, your aperture should generally be as wide as your lens allows (e.g., f/2.8, f/1.8) to gather maximum light. This enables you to maintain faster shutter speeds. However, a wide aperture also results in a shallower depth of field (DoF). This means less of your scene will be in sharp focus. For a single train, this might be desirable for subject isolation, but if you want the entire train or surrounding elements sharp, you'll need to stop down to f/4 or f/5.6, which then requires a slower shutter speed or higher ISO. It's a constant balancing act.
Expert Insight: "The pursuit of sharpness in low light isn't about one setting; it's about the intelligent interplay between all three pillars of exposure. Prioritize shutter speed for motion, then open your aperture, and only then consider increasing ISO. This hierarchy is key."
Case Study: The 'Night Express' Challenge
Case Study: The 'Night Express' Challenge on the Trans-Siberian
I once had a particularly challenging assignment to capture a specific freight train, known locally as the 'Night Express', on a remote section of the Trans-Siberian Railway. It was a moonless night, and the train was moving at a considerable pace. My initial attempts at f/2.8 and 1/250s resulted in noticeable blur due to the train's speed. Recognizing the need for a faster shutter, I bumped it to 1/800s. To compensate for the lost light, I had to push my ISO from 1600 to 6400. While the noise was present, the razor-sharp details of the locomotive's front and the individual freight cars were perfectly frozen. Post-processing handled the noise effectively, yielding a powerful image that truly conveyed the train's momentum. This experience reinforced the principle: prioritize freezing motion, then manage noise.
ISO Management: Taming the Noise Beast
ISO controls your camera's sensitivity to light. While increasing ISO allows you to use faster shutter speeds or smaller apertures in low light, it comes at the cost of introducing digital noise – those unsightly speckles that degrade image quality.
Finding the Sweet Spot
Every camera has an 'ISO sweet spot' where it performs optimally before noise becomes intrusive. For many modern full-frame cameras, ISO 3200 or 6400 might be perfectly usable, especially after some noise reduction in post-processing. Know your camera's limits. I always recommend shooting in RAW, as it retains far more image data than JPEG, giving you greater flexibility to recover details and reduce noise in editing.
Noise Reduction: In-Camera vs. Post-Processing
Most cameras offer in-camera noise reduction, but I generally advise against it for high ISOs, especially for RAW files. In-camera processing can be aggressive, often smoothing out fine details along with the noise. It's almost always better to handle noise reduction in post-processing software like Adobe Lightroom or Topaz DeNoise AI, where you have finer control over the balance between noise reduction and detail preservation.
| ISO Setting | Noise Level | Detail Retention | Use Case |
|---|---|---|---|
| 800 | Minimal | Excellent | Moderate low light, tripod, slower speeds |
| 1600 | Low | Very Good | Handheld in dim light, faster shutter |
| 3200 | Moderate | Good | More challenging low light, still acceptable for prints |
| 6400+ | High | Fair to Good | Extreme low light, digital noise reduction essential |
Focusing in the Dark: Pinpoint Precision
Autofocus systems struggle in low light due to the lack of contrast. Achieving sharp focus on a moving target in the dark requires a strategic approach.
Autofocus Modes: Continuous and Tracking
Set your camera to Continuous Autofocus (AF-C on Nikon, AI Servo on Canon). This mode continuously adjusts focus as the subject moves. Pair this with a dynamic or 3D tracking autofocus area mode, which uses multiple focus points to follow your subject as it traverses the frame. Practice is key here; anticipate the train's path and keep your chosen focus point locked onto the locomotive's front.
Manual Focus & Focus Peaking
For static shots or if your autofocus is truly struggling, manual focus can be your savior. Pre-focus on a point where you expect the train to be, such as a specific track section or signal post. Many modern mirrorless cameras offer focus peaking, which highlights in-focus areas, making manual focusing in the dark much easier. For DSLRs, live view with magnification can help, though it's slower.
Utilizing Available Light
Don't overlook the train's own headlights and ditch lights! These can often provide just enough contrast for your autofocus system to latch onto. Similarly, station lights or distant streetlights can offer points of focus. As marketing guru Seth Godin often says, "The systems that work are the ones that are designed to work under stress." Your focusing system needs every advantage it can get in low light.
The Art of Panning: Controlled Blur, Sharp Subject
Sometimes, total motion freezing isn't the goal. Panning is a technique that intentionally blurs the background while keeping the moving subject relatively sharp, conveying a powerful sense of speed.
The Panning Technique: A Step-by-Step Guide
- Choose a Slower Shutter Speed: Unlike freezing motion, panning requires a slower shutter speed, typically between 1/30th and 1/125th of a second, depending on the train's speed and desired blur. Experiment!
- Position Yourself: Stand parallel to the tracks, ensuring you have a clear, unobstructed view of the train's approach and departure.
- Track the Subject: As the train approaches, smoothly track it with your camera, keeping its front in your viewfinder or on your LCD.
- Smooth Release: Press the shutter button down and continue to pan smoothly with the train even after the shutter has fired. This follow-through is crucial for a consistent blur.
- Continuous Autofocus: Use continuous autofocus to help keep the train sharp as you pan.
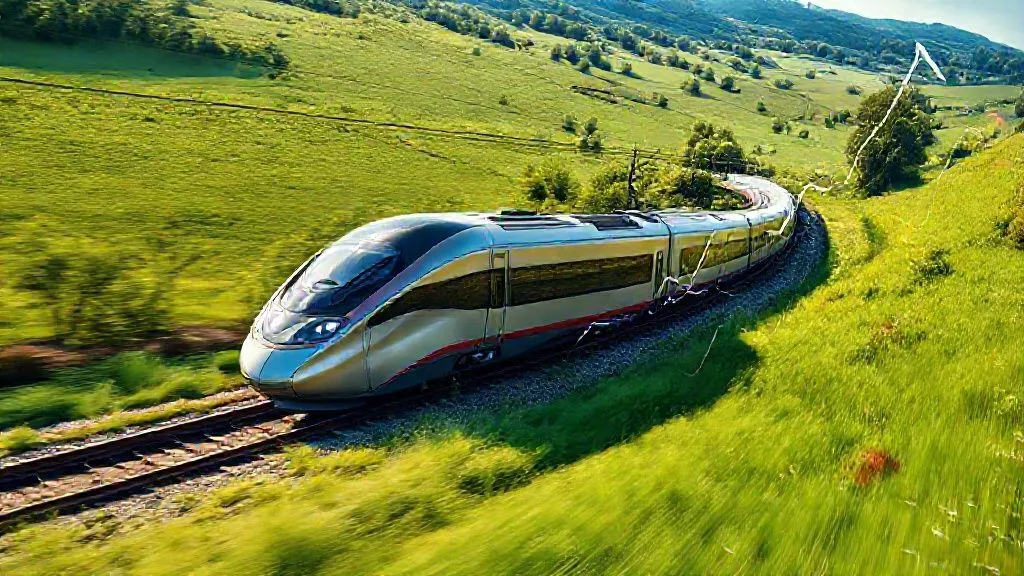
 is beautifully blurred horizontally due to panning, shot at dusk with dramatic light trails from the train's windows, depth of field highlighting the train, shot on a high-end DSLR.")
Low Light Panning Considerations
Panning in low light adds another layer of complexity. The slower shutter speeds required for panning naturally gather more light, which can be an advantage. However, maintaining sharp focus on the subject while panning in dim conditions is challenging. Practice, patience, and a steady hand are your best allies. According to a study published in the Journal of Photographic Science, consistent panning technique is more critical than minor adjustments in shutter speed for achieving optimal blur and sharpness.
Light Painting & External Lighting: Creative Solutions
When the available light is truly dismal, sometimes you need to bring your own. Creative lighting techniques can transform a mundane low-light scene into a breathtaking image.
Light Painting with LED Panels
For stationary trains (e.g., in a yard or museum), light painting offers incredible control. Using a long exposure (from several seconds to minutes) and a powerful LED light panel or flashlight, you can 'paint' light onto specific parts of the train. This allows you to selectively illuminate details, create dramatic shadows, and add depth that wouldn't be possible with ambient light alone. Experiment with different angles and distances for varied effects.
Off-Camera Flash: A Burst of Clarity
For moving trains, off-camera flash can be used, though it requires careful setup and safety considerations. A powerful speedlight or studio strobe, triggered remotely, can provide a burst of light to freeze motion and illuminate the train. This is particularly effective for capturing details of the train's side as it passes. However, ensure your setup is secure, out of the way of the train, and that the flash won't distract or endanger the train crew or passengers. Always prioritize safety over the shot.
Expert Insight: "Using artificial light in railway photography is like conducting an orchestra. Each light source is an instrument, and you, the photographer, are the conductor, directing the light to create harmony and drama in the darkness."
Post-Processing: The Final Polish
Even with perfect in-camera technique, post-processing is where you can truly elevate your low-light train photographs, especially in managing noise and enhancing sharpness.
Noise Reduction Software
Dedicated noise reduction software like Topaz DeNoise AI or DxO PhotoLab's DeepPRIME are game-changers for high-ISO images. They use advanced algorithms to intelligently reduce noise while preserving crucial details, often yielding results far superior to in-camera or basic Lightroom/Photoshop noise reduction. Invest in one if low-light photography is a passion.
Sharpening Techniques
Apply sharpening judiciously. Over-sharpening can introduce artifacts and make noise more prominent. I typically use a two-stage sharpening process: a subtle capture sharpening upon import, and then a more targeted creative sharpening on specific details (like the train's livery or wheels) after noise reduction. Techniques like 'clarity' and 'dehaze' sliders in Lightroom can also enhance perceived sharpness and contrast without aggressive sharpening.
Contrast and Dynamic Range
Low-light scenes often lack contrast. Boost your contrast and adjust blacks/whites to add punch. However, be mindful of crushing shadows or blowing out highlights, especially if the train's headlights are bright. Utilize the tone curve for fine-grained control over your image's dynamic range. According to a tutorial from the renowned photography resource B&H Photo Explora, effective noise reduction and selective sharpening are key to making low-light images shine.
Safety First: Essential Considerations
No photograph is worth risking your life or violating regulations. Railway photography, especially in low light, carries inherent risks.
Always Be Aware of Your Surroundings
Trains are fast, quiet, and cannot stop quickly. Never trespass on railway property. Always stay a safe distance from the tracks, even when you think no train is coming. Be aware of trip hazards in the dark. A good headlamp is essential for moving around safely.
Permission and Regulations
Always seek permission when photographing on private property, such as station platforms outside public access areas, or railway yards. Familiarize yourself with local railway regulations regarding photography. Many railway companies have strict rules, particularly concerning flash photography near active lines, which can distract train operators. For instance, Network Rail in the UK provides extensive safety guidelines for anyone near tracks.

Working with Others
If you're photographing with a group, communicate clearly about positions and any lighting equipment. Ensure everyone is aware of the train schedule (if known) and has a clear escape route. Never assume an area is safe because others are there. As the Federal Railroad Administration (FRA) consistently emphasizes, railway safety is a shared responsibility.
Frequently Asked Questions (FAQ)
Q: What's the absolute minimum shutter speed I can use for a moving train? A: This is highly variable. For a fast-moving train (e.g., 60+ mph) close to you, you might need 1/500s or faster to freeze it completely. For slower-moving trains or more distant shots, you might get away with 1/250s or even 1/160s, especially if you're panning. However, to guarantee razor sharpness, err on the side of faster shutter speeds.
Q: Should I use a flash in low-light train photography? A: Using flash on active railway lines is generally discouraged and often prohibited due to safety concerns (distracting train operators). However, for stationary trains in yards or museums, off-camera flash or light painting can be very effective and safe. Always check local regulations and prioritize safety.
Q: How do I deal with the bright headlights of an approaching train in low light? A: This is a common challenge. The bright headlights can cause lens flare and blow out the highlights in your image. Try to compose your shot so the headlights don't directly face your lens for too long. Using a lens hood can help reduce flare. In post-processing, you can use local adjustments (e.g., a radial filter or brush) to reduce the highlights and bring back some detail in the brightest areas. Bracketing exposures (taking multiple shots at different exposures) can also provide more dynamic range to work with.
Q: Is it better to shoot in Aperture Priority or Shutter Priority mode for low-light trains? A: For freezing motion, I generally recommend Shutter Priority (Tv or S mode). This allows you to set your crucial shutter speed, and the camera will then select the appropriate aperture. However, if you're comfortable with manual mode, that gives you the most control. Aperture Priority is more suitable when depth of field is your primary concern and motion blur is less of an issue (e.g., for stationary trains).
Q: What's the best lens for low-light train photography? A: A fast telephoto zoom lens, like a 70-200mm f/2.8, is often considered ideal. It offers both reach and a wide aperture to gather ample light. For wider, environmental shots, a fast prime lens (e.g., 35mm f/1.4 or 50mm f/1.4) can be excellent, particularly for capturing the overall scene and light trails.
Key Takeaways and Final Thoughts
- Prioritize Shutter Speed: To freeze motion, a fast shutter speed (1/500s or more) is your primary weapon.
- Embrace Wide Apertures: Use fast lenses (f/2.8 or wider) to maximize light gathering and allow for faster shutter speeds or lower ISOs.
- Manage ISO Intelligently: Know your camera's high-ISO performance and utilize noise reduction software in post-processing.
- Master Focusing: Use continuous autofocus (AF-C/AI Servo) with dynamic area modes, or pre-focus manually.
- Consider Panning: For artistic blur, practice smooth panning with slower shutter speeds.
- Explore Creative Lighting: For stationary trains, light painting or off-camera flash can add dramatic flair.
- Safety Above All: Always maintain a safe distance, respect regulations, and be aware of your surroundings.
Capturing razor-sharp train motion in challenging low light conditions is a testament to both technical skill and artistic vision. It's a journey of experimentation, learning, and sometimes, a little frustration. But with the right gear, a solid understanding of exposure, and a commitment to safety, you're now equipped to turn those elusive, dimly lit scenes into stunning, sharp photographs that truly convey the power and majesty of the railway. Go forth, experiment, and may your lenses always be sharp and your trains perfectly frozen!
Recommended Reading
- Unveiling the Arctic & Antarctic: What to Expect on Your Polar Expedition Cruise
- How to Guarantee Clients Best Unobstructed Ocean View Rooms: 7 Expert Strategies
- 7 Pro Tips: Prevent Ice Surface Degradation in High-Traffic Rinks
- 5 Proven Ways to Bond on Multi-Gen Trips Without Work Stress
- High-Speed Rail Europe: Pro Travel Tips for Seamless Journeys


Your email address will not be published. Required fields are marked *