
How to Safely Evacuate a Critically Injured Client from Remote Winter Trails?
For over two decades navigating the unforgiving beauty of winter wilderness, I've witnessed firsthand the profound challenges and immense responsibilities that come with leading clients into remote, snow-laden landscapes. It's a privilege, but one that demands unwavering preparedness for the worst-case scenario. The crisp air, the glistening snow, the silent majesty – all can turn treacherous in an instant, especially when a critical injury strikes far from help.
The stark reality is that a severe injury on a remote winter trail isn't just a medical emergency; it's a complex logistical puzzle where every decision carries life-or-death weight. The cold saps energy, time works against you, and the very environment that draws us in becomes an adversary. The panic, the pain, the isolation – these factors compound the difficulty, testing even the most seasoned guides.
This comprehensive guide isn't just a theoretical exercise; it’s born from years of hands-on experience and rigorous training. I'll walk you through a proven framework, from immediate on-scene stabilization to the intricacies of communication, improvised transport, and coordinating with external rescue teams. By the end, you’ll have a clear, actionable understanding of how to safely evacuate a critically injured client from remote winter trails, equipped with the knowledge to make confident, life-saving decisions.
1. The Golden Hour: Immediate Assessment and Stabilization
When an incident occurs, the first few moments – often referred to as the 'golden hour' – are absolutely critical. Your immediate actions can dramatically influence the outcome for a critically injured client. Panic is the enemy; a calm, systematic approach is your most powerful tool.
Initial Scene Survey and Safety
Before you even approach the client, conduct a rapid scene survey. What caused the injury? Is the area still hazardous? Are there unstable snowpacks, ice, or other environmental dangers? Your safety and the safety of any uninjured clients are paramount. You cannot help if you become a casualty yourself. Secure the area, if possible, and ensure everyone is out of immediate danger.
Once the scene is safe, approach the client. Introduce yourself calmly, explain what you're doing, and reassure them. Remember, their psychological state is also a critical factor. A calm, authoritative presence can significantly reduce their anxiety and help them cooperate.
Primary Assessment (ABCDE)
Perform a rapid primary assessment using the ABCDE mnemonic, adapted for wilderness settings:
- A - Airway: Is the airway open and clear? Check for obstructions.
- B - Breathing: Is the client breathing? What's the rate and quality? Listen, look, and feel.
- C - Circulation: Check for a pulse and any severe bleeding. Control any life-threatening hemorrhage immediately with direct pressure, elevation, or a tourniquet if necessary.
- D - Disability (Neurological Status): Assess their level of consciousness using the AVPU scale (Alert, Verbal, Pain, Unresponsive).
- E - Environment/Exposure: Get them out of the elements as much as possible. This is especially crucial in winter.
Address any life threats found in this primary survey immediately. For instance, if the airway is blocked, clear it. If there's severe bleeding, stop it. According to the Wilderness Medical Society, managing these initial threats within minutes is key to improving survival rates in remote environments.
Managing Hypothermia and Shock
In a winter environment, hypothermia is a constant, insidious threat that can quickly complicate any injury. Even a mildly injured person can become hypothermic rapidly if not protected. Remove wet clothing, insulate them from the ground, and use all available layers – sleeping bags, emergency blankets, extra jackets – to create a 'burrito wrap' of warmth. Provide warm, sugary drinks if they are conscious and able to swallow.
Shock is another critical concern. It's the body's response to inadequate tissue perfusion. Treat for shock by keeping the client warm, elevating their legs (if no spinal injury is suspected), and monitoring their vital signs closely. Be vigilant for changes in mental status, skin color, and breathing patterns. I've seen situations where a relatively minor injury became life-threatening due to untreated hypothermia and shock.

2. Communication is Key: Alerting Emergency Services
Once immediate life threats are managed and the client is stabilized as best as possible, the next critical step is to initiate communication for external help. In remote winter environments, this is often the most challenging aspect, as traditional cell service is non-existent.
Pre-trip Planning for Communication
Effective communication starts long before the emergency. Every winter trip into remote areas must include a robust communication plan. This means carrying multiple, redundant communication devices. These typically include a satellite messenger (like an InReach or Zoleo), a satellite phone, or a Personal Locator Beacon (PLB). Ensure these devices are fully charged, tested, and that all group members know how to operate them.
Furthermore, establish an emergency contact protocol. Who is your designated contact person back home? What information do they need? What is their role in initiating a rescue? A detailed itinerary left with this contact, including planned routes, estimated return times, and emergency numbers, is invaluable. As NOLS emphasizes, preparedness is the cornerstone of wilderness safety.
Activating Your Emergency Plan (Satellite Devices, PLBs)
When an emergency arises, immediately activate your most reliable communication device. For satellite messengers, send an SOS message with your exact location. If you have a satellite phone, attempt to call your emergency contact or a direct rescue line if pre-programmed. PLBs, once activated, transmit a distress signal to a global search and rescue network, providing your location. Understand the nuances of each device – some allow two-way communication, others are one-way distress signals.
Relaying Critical Information
Once contact is established, the information you provide is paramount. Rescuers need a clear, concise, and accurate picture of the situation. Use the 'M.I.S.T.' mnemonic to organize your report:
- M - Mechanism of Injury: How did the injury occur? (e.g., "fell 20 feet onto rocks while skiing")
- I - Injuries Found: What specific injuries have you identified? (e.g., "open fracture right tibia, possible head injury, signs of hypothermia")
- S - Signs and Symptoms: What are the client's vital signs and observed symptoms? (e.g., "conscious but disoriented, shivering violently, pulse weak and rapid")
- T - Treatment Given: What first aid have you provided? (e.g., "wound dressed, splint applied, client insulated in sleeping bag")
Also, provide your exact GPS coordinates, the number of people in your party, the client's name and age, current weather conditions, and any specific requests for rescue resources (e.g., "helicopter evacuation needed"). Be prepared for follow-up questions and maintain communication as long as possible.
"In remote rescue, communication isn't just about sending a signal; it's about painting a vivid, accurate picture for those who are coming to help. Precision saves lives and resources."
| Communication Device | Pros | Cons | Best Use Case |
|---|---|---|---|
| Satellite Messenger (e.g., InReach) | Two-way texting, GPS tracking, weather updates | Subscription required, slower than sat phone for calls | Regular check-ins, detailed text communication, SOS activation |
| Satellite Phone | Voice communication, faster relay of complex info | Higher cost, bulkier, battery life can be limited | Urgent voice communication with emergency services/contact |
| Personal Locator Beacon (PLB) | One-button SOS, no subscription needed (after purchase), direct to SAR | No two-way communication, only for extreme emergencies | Final resort for life-threatening emergencies when other comms fail |
3. On-Site Advanced First Aid and Client Care
While waiting for external rescue, your role shifts to providing sustained advanced first aid and maintaining the client's condition. This is where your wilderness medical training truly comes into play, extending beyond basic first aid to prolonged care in challenging conditions.
Trauma Management in Cold Environments
Managing trauma in the cold requires specific considerations. For fractures, proper splinting is crucial, but ensure splints don't restrict circulation, especially as limbs may swell or as temperatures drop. Use padding to prevent pressure sores and further insulate the injured limb. For open wounds, meticulous cleaning (if possible with sterile water) and dressing are vital to prevent infection, which can quickly become severe in a remote setting. Monitor all dressings for signs of constriction or excessive fluid buildup.
Head injuries are particularly concerning. Continuously monitor the client's neurological status for any changes in consciousness, pupils, or motor function. Keep them as still as possible and maintain spinal precautions if a spinal injury is suspected. The cold itself can mask some symptoms or make others worse, so constant vigilance is necessary.
Pain Management and Psychological Support
Pain management is not just about comfort; severe pain can contribute to shock and exhaustion. If you carry appropriate wilderness first aid medications, administer them according to your training and protocols. Beyond medication, simple comforts like repositioning, gentle reassurance, and distraction can make a significant difference. Talk to your client, explain what's happening, and maintain a calm, empathetic demeanor. A critically injured person in a remote setting is facing immense fear and uncertainty.
Your leadership provides crucial psychological support. Empower them where possible, for example, by asking them to help hold a blanket. Keep them informed about communication efforts and the expected arrival time of rescuers. This transparency builds trust and can reduce anxiety.
Case Study: The Whiteout Evacuation
Case Study: The Whiteout Evacuation in the Tetons
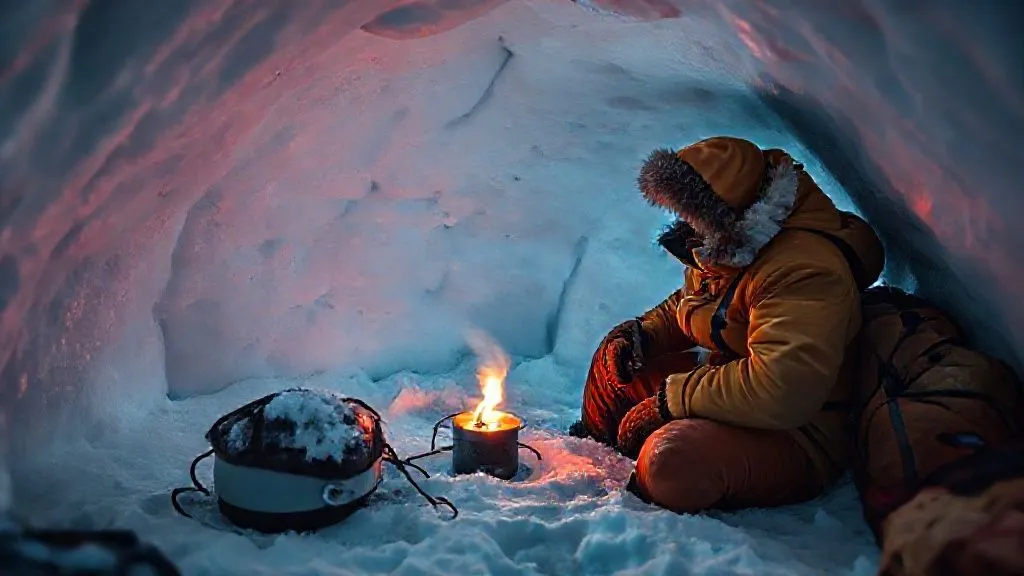
I recall a harrowing incident in the Tetons where a client, a fit backcountry skier, sustained a severe lower leg fracture after an unexpected fall into a tree well during a sudden whiteout. We were five miles from the trailhead, and the weather was deteriorating rapidly. After stabilizing the fracture and insulating him heavily, our satellite messenger indicated a 6-8 hour wait for a helicopter due to the worsening conditions.
The immediate challenge was managing his pain and the onset of hypothermia. We administered pain medication and constructed a makeshift shelter using a tarp and ski poles. We used chemical heat packs and our own body heat to keep him warm, constantly monitoring his mental status. The psychological toll was immense for him, so we engaged him in conversation, focusing on positive memories and future plans. We maintained communication with SAR, providing hourly updates on his condition and the weather. When the ground team finally reached us, he was cold and exhausted, but stable. This experience underscored the importance of sustained care, communication, and psychological resilience during prolonged waits.
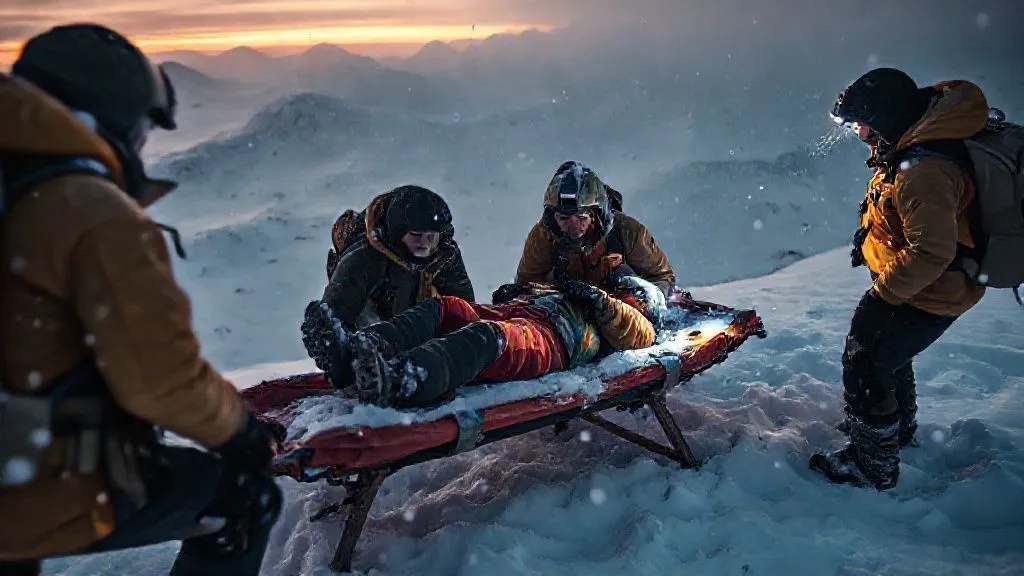
4. Improvised Transport: Principles and Techniques
While awaiting external help, or if external help is delayed or impossible, you may need to consider moving the client yourself. This is a high-risk maneuver, especially with a critically injured client, and should only be undertaken after careful consideration and with appropriate training.
Assessing Feasibility of Self-Evacuation vs. Assisted Carry
The decision to move a critically injured client is complex. Ask yourself:
- Is the client's injury stable enough for movement? (e.g., spinal injury makes movement extremely risky)
- Do you have enough capable personnel to move them safely without further injury?
- Is the terrain passable?
- How far is the nearest accessible point for external rescue?
- Are the environmental conditions deteriorating rapidly?
If the answer to any of these questions indicates high risk, it's often safer to shelter in place and await professional rescue. However, if conditions mandate a move (e.g., imminent avalanche danger, severe exposure without shelter), you must be prepared.
Constructing an Improvised Stretcher
In a winter environment, skis, ski poles, and even snowshoes can be used to construct an improvised stretcher. A common technique involves lashing two skis together with poles and using jackets, tarps, or emergency blankets to create a stable bed. Ensure the client is well-padded and secured to prevent movement and further injury during transport. The goal is to create a rigid platform that minimizes movement of the spine and injured limbs.
Practice these techniques during training exercises. The REI Expert Advice section often features great tips on improvised gear for wilderness emergencies. Remember, proper lashing and knot-tying are crucial for stability and safety. Improvised stretchers are never as good as professional ones, but they can be life-saving.
Safe Patient Handling and Movement
When moving the client, communicate every step to both the client and your team. Designate a leader for the stretcher team to call out commands. Movement should be slow, deliberate, and coordinated. Distribute the client's weight evenly among the carriers to prevent strain and fatigue. In snowy terrain, breaking trail ahead of the stretcher team can significantly reduce effort.
Take frequent breaks to assess the client's condition and the team's fatigue. Monitor for signs of hypothermia in both the client and carriers. Remember, the goal is safe, gentle movement, not speed. A stumble or a drop could have catastrophic consequences for a critically injured client.

5. Navigating the Terrain: Route Selection and Team Management
Moving a critically injured client in a remote winter environment isn't just about the patient; it's about managing your entire team and the challenging terrain. Every step must be planned and executed with precision.
Choosing the Safest Path
Your primary goal when moving is to choose the path of least resistance and greatest safety. This often means avoiding steep ascents or descents, heavily treed areas, or sections with high avalanche risk. Even if it means a longer route, a safer path is always preferable. Scout ahead if possible to identify hazards like hidden crevasses, thin ice, or unstable snow bridges.
Consider the impact of the weight of the stretcher on snow conditions. Fresh powder might be easy to fall into, but deep, heavy snow can be incredibly draining to move through. Hard-packed snow or ice might require crampons for the team and careful footing. Always prioritize stability over speed, especially with a critically injured client.
Team Roles and Rotation
Effective team management is crucial. Assign specific roles to each member of your party:
- Stretcher Leader: Directs movement, calls out commands, monitors the client.
- Stretcher Bearers: Carry the client, rotate positions frequently to prevent fatigue.
- Trail Breaker: Leads the way, compacting snow for easier passage.
- Navigator: Ensures the team stays on the safest, most efficient route.
- Logistics/Support: Manages gear, food, water, and communicates with external rescue.
Regular rotation of roles, especially stretcher bearers and trail breakers, is essential to manage fatigue. As the Mountain Rescue Association constantly reminds us, team endurance is a critical factor in successful operations.
Pacing and Energy Conservation
Set a slow, steady pace. Rushing will only lead to exhaustion, mistakes, and potential further injury to the client or the team. Take frequent, short breaks to rest, rehydrate, and reassess. Monitor your team for signs of fatigue, hypothermia, or frostbite. Ensure everyone is eating and drinking regularly to maintain energy levels.
Energy conservation applies to the client as well. Minimize their movement and exposure. If you have to stop for an extended period, re-insulate them immediately. Remember, every calorie burned by the client is a calorie they don't have for recovery. This is a marathon, not a sprint, when you need to safely evacuate a critically injured client from remote winter trails.
| Role | Key Responsibilities | Essential Skills |
|---|---|---|
| Stretcher Leader | Client monitoring, movement commands, route assessment | Leadership, medical knowledge, communication |
| Stretcher Bearer | Carrying the stretcher, maintaining steady pace | Physical endurance, teamwork, coordination |
| Trail Breaker | Compacting snow, identifying immediate hazards | Navigation, snow assessment, physical endurance |
| Navigator | Route planning, GPS/map use, liaison with SAR | Advanced navigation, communication, strategic thinking |
6. Preparing for External Rescue: Marking and Rendezvous
Once external rescue is en route, your focus shifts to preparing for their arrival and ensuring a smooth, safe rendezvous. This involves making your location obvious and understanding rescue protocols.
Establishing a Landing Zone or Extraction Point
If helicopter rescue is anticipated, identify and prepare a suitable helicopter landing zone (HLZ). This area should be:
- Flat and Level: As flat as possible, free of significant slopes.
- Clear of Obstacles: No trees, power lines, or tall rocks within at least a 100x100 foot area (larger is better).
- Free of Loose Debris: Secure any loose items like tarps, sleeping bags, or garbage that could be blown into the rotor.
- Marked Clearly: Use brightly colored clothing, tarps, or even snow trenches to mark the corners of the HLZ. If it's night, use headlamps or flashlights to mark the perimeter, pointing them inward.
- Wind Direction: Indicate wind direction to the pilot if possible (e.g., with a flag or by kneeling with your back to the wind).
If ground rescue is coming, identify the most accessible point on your route for them to meet you. This might be a clear trail junction, a wide open area, or a recognizable landmark. Communicate this precise location to rescuers.
Signaling Techniques (Visual, Audible)
Make your presence known. In daylight, use highly visible signals. A large, brightly colored tarp spread on the snow can be seen from a great distance. Use signal mirrors, or even build a large 'SOS' in the snow with contrasting materials like branches or dark rocks if available. For night-time, use bright lights (headlamps, flashlights) to signal. Three flashes repeated is a universal distress signal.
Audible signals like whistles (three short blasts repeated) can also be effective, especially in foggy or low-visibility conditions. Be mindful of conserving batteries for lights and devices.
Liaison with Rescuers
When rescuers arrive, they will likely approach with caution. Be prepared to provide a quick, concise update on the client's condition, the treatment given, and any changes since your last communication. Follow their instructions precisely. They are trained professionals with specific protocols for rescue operations.
Step back and allow them to take over patient care. Your role then shifts to assisting them as directed, for example, by helping with gear or providing logistical support. Remember, safety is still paramount during the rescue phase. Do not interfere unless explicitly asked to help. Your clear communication and preparation will greatly expedite their work to safely evacuate a critically injured client.

7. Post-Evacuation: Debriefing and Learning
The rescue of a critically injured client doesn't end when the stretcher disappears over the horizon. The aftermath is equally important for the well-being of your team and for future preparedness. This phase involves both emotional processing and critical analysis.
Critical Incident Stress Management
Experiencing a critical incident, especially one involving severe injury or potential fatality, can be deeply traumatic for everyone involved. As a leader, it's your responsibility to ensure your team has access to Critical Incident Stress Management (CISM) resources. This might involve formal debriefings with mental health professionals or simply providing a safe space for team members to talk about their experiences and emotions. There is no shame in seeking support; it’s a sign of strength and professionalism.
Recognize signs of stress in yourself and others: sleep disturbances, irritability, emotional numbness, or difficulty concentrating. Encourage open communication and mutual support. According to research published by the National Oceanic and Atmospheric Administration (NOAA) on emergency response, addressing psychological impacts is as vital as physical recovery.
Reviewing the Emergency Plan
Once the immediate crisis has passed and emotions have settled, conduct a thorough, objective review of the entire incident. This is not about assigning blame, but about learning and improving. Ask:
- What went well?
- What could have been done better?
- Were there any gaps in our training or equipment?
- Was the communication plan effective?
- How did the team perform under pressure?
Document these findings meticulously. Update your emergency action plans, gear lists, and training protocols based on the lessons learned. Every incident, no matter how challenging, offers invaluable opportunities for growth.
Continuous Training and Preparedness
The wilderness is constantly changing, and so should our skills. This incident should reinforce the need for continuous training. Regularly refresh your wilderness first aid certifications (WFR, WEMT). Practice improvised rescue techniques. Conduct mock drills with your team, simulating various injury scenarios and environmental conditions. Test your communication devices regularly.
Stay updated on the latest rescue techniques and gear. The more prepared you and your team are, the more confident and effective you will be when facing the next challenge. Because in the world of remote winter guiding, it's not a matter of *if* an incident will occur, but *when* you'll need to safely evacuate a critically injured client.

Frequently Asked Questions (FAQ)
Question: What's the single most important piece of gear for remote winter trail safety? The single most important piece of gear isn't a single item, but rather a robust, redundant communication system. This includes a satellite messenger with two-way capabilities, a satellite phone, and/or a Personal Locator Beacon (PLB). These devices are your lifeline to external help when cell service is unavailable, allowing you to effectively communicate the need to safely evacuate a critically injured client. Without the ability to call for help, even the best first aid is limited.
Question: How do I manage a suspected spinal injury on an improvised stretcher in deep snow? Managing a suspected spinal injury is incredibly challenging and risky in remote winter environments. The priority is to minimize movement. If possible, keep the client in the position found until professional rescuers arrive. If movement is absolutely necessary (e.g., due to immediate life threat or extreme exposure), use a rigid improvised stretcher (like skis lashed together) and ensure meticulous stabilization of the head, neck, and torso. Use padding to fill voids and secure the client firmly to the stretcher to prevent any rotational or lateral movement. This requires multiple rescuers working in perfect coordination.
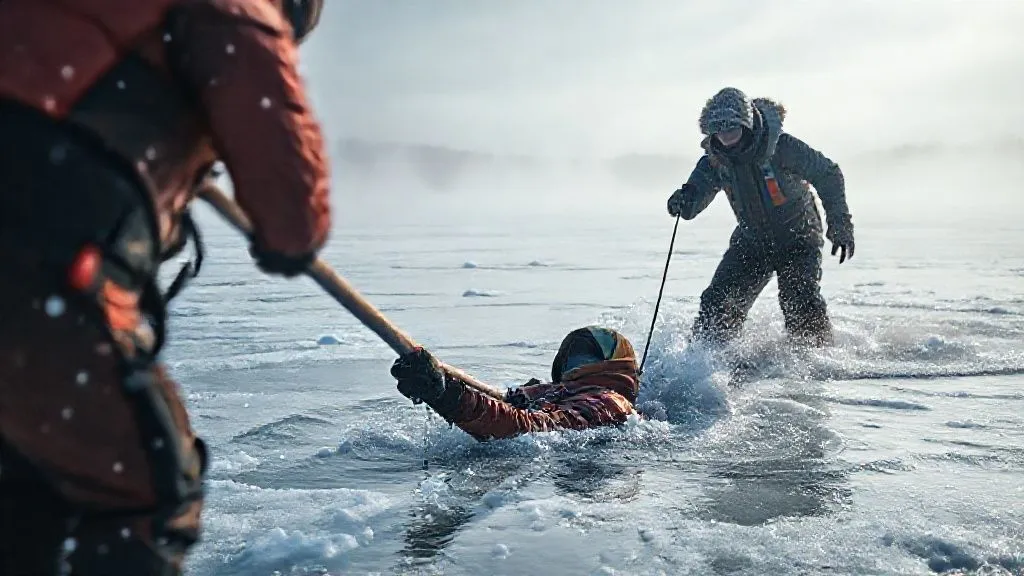
Question: What are the biggest risks to rescuers during a remote winter evacuation? Rescuers face numerous risks, including hypothermia, frostbite, exhaustion, avalanche danger, crevasse falls, and navigating difficult terrain in challenging weather. The mental and physical strain of carrying a critically injured client over long distances in the cold can also lead to errors or injuries for the rescuers. Proper training, adequate gear, conservative decision-making, and strong team leadership are essential to mitigate these risks and ensure the safety of everyone involved.
Question: How do you handle a client who becomes combative or uncooperative due to pain, hypothermia, or head injury? This is a very difficult situation. First, try to identify the cause: is it pain, hypothermia (which can cause confusion and irrational behavior), a head injury, or psychological distress? Address any treatable causes immediately (e.g., rewarm for hypothermia, administer pain meds). Maintain a calm, reassuring, but firm demeanor. Use clear, simple commands. If necessary, you may need to use gentle physical restraints (e.g., wrapping them tightly in a sleeping bag) to prevent them from harming themselves or others, always prioritizing their safety and minimizing further injury. This is a last resort and requires careful judgment.
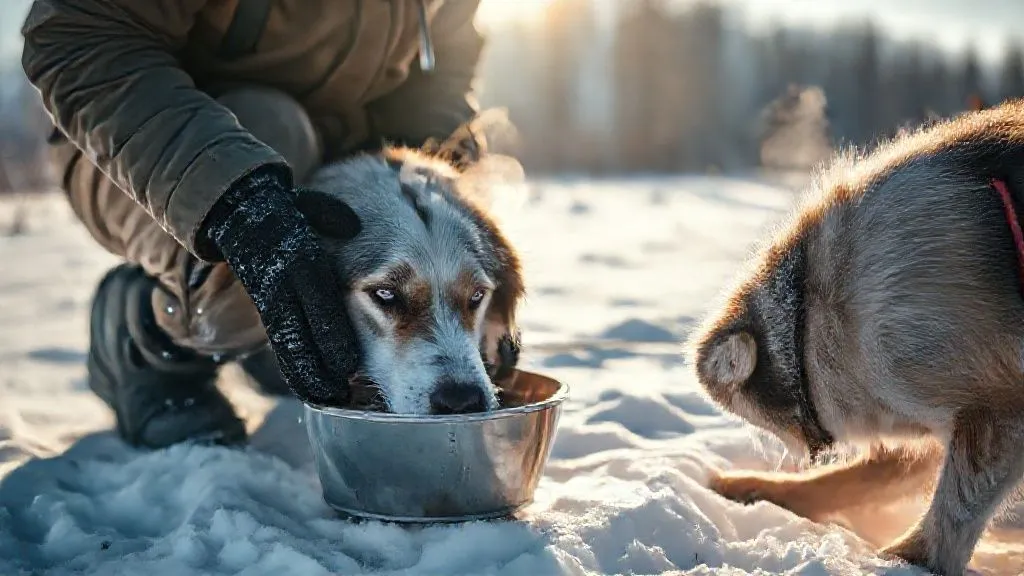
Question: What's the role of nutrition and hydration for both the client and the team during a prolonged remote rescue? Nutrition and hydration are absolutely vital for maintaining energy, warmth, and cognitive function for both the critically injured client and the rescue team during a prolonged incident. For the client, if conscious and able to swallow, provide warm, sugary drinks and easily digestible, high-calorie foods to combat hypothermia and maintain energy. For the team, consistent intake of high-calorie snacks, hot drinks, and meals is essential to prevent fatigue, maintain core body temperature, and ensure they have the physical and mental stamina to continue the rescue effort. Dehydration can rapidly lead to exhaustion and impaired judgment in cold environments.
Key Takeaways and Final Thoughts
- Prioritize Safety: Your safety and the safety of uninjured clients come first. A systematic scene survey is non-negotiable.
- Act Swiftly, Systematically: The 'golden hour' demands immediate primary assessment (ABCDE) and aggressive hypothermia/shock management.
- Communicate Relentlessly: Redundant satellite communication is your lifeline. Provide clear, concise, and accurate information (MIST).
- Master On-Site Care: Prolonged patient care, including trauma management and psychological support, is crucial while awaiting rescue.
- Train for Improvised Transport: Understand when and how to safely move a client using improvised methods, always prioritizing stability over speed.
- Prepare for External Rescue: Clear landing zones, effective signaling, and precise liaison are critical for a smooth rendezvous.
- Debrief and Learn: Post-incident review and continuous training are essential for team well-being and future preparedness.
Navigating the complexities of a critical injury on remote winter trails is arguably one of the most demanding challenges a wilderness leader can face. It tests your medical skills, your leadership, and your resilience. But with diligent preparation, rigorous training, and a deep understanding of these protocols, you can transform a desperate situation into a successful rescue. Remember, the wilderness demands respect and preparedness, and by mastering these skills, you not only protect your clients but also uphold the highest standards of your profession. Stay safe, stay sharp, and always be ready to act when it matters most.
Recommended Reading
- Unlock the Secrets: Your Ultimate Guide to Responsible Indigenous Travel Guidelines
- Burnout Breakthrough: 7 Steps to Choosing Your Perfect Meditation Getaway
- Unlock Free Adventures: Your Ultimate Guide to Discovering Local Events on a Budget
- Boost Space Tourism: How Advanced Materials Enhance Vehicle Reusability
- Wellness Travel for Stress: Your Ultimate Unwinding Guide

Your email address will not be published. Required fields are marked *