
How to Get Professional Self-Portraits When Traveling Solo?
For over 15 years, traversing the globe with just my backpack and camera, I've seen the sheer joy—and sometimes, the profound frustration—of solo travelers trying to capture their journey. There's a unique magic in exploring the world alone, but translating that experience into a professional-grade self-portrait often feels like an insurmountable challenge, leaving many with an album full of blurry selfies or awkward arm-length shots.
The common pain point is clear: you want to be in your travel memories, not just behind the lens. You dream of those stunning, magazine-worthy shots that truly convey the emotion and scale of your adventure, but without a dedicated travel buddy or a professional photographer, it seems impossible. You've tried the self-timer, wrestled with unstable surfaces, and perhaps even given up on the idea of being a part of your own breathtaking landscapes.
But what if I told you that achieving those professional self-portraits when traveling solo is not only possible but entirely within your reach? In this definitive guide, I'll share my battle-tested frameworks, expert insights, and actionable steps to transform your solo travel photography. From mastering your gear to understanding light and composition, you'll learn how to consistently capture stunning, authentic images that tell your unique story.
Mastering Your Gear: The Solo Photographer's Essential Kit
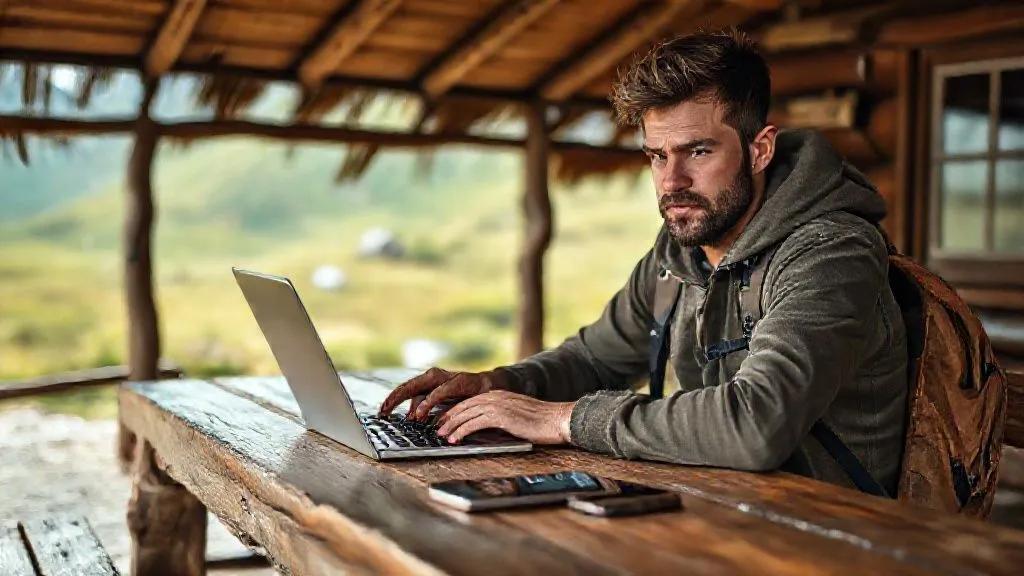
Your journey to professional self-portraits begins with the right tools. As a solo traveler, every item in your bag must earn its place, especially your photography gear. It's not about having the most expensive equipment, but the smartest and most reliable.
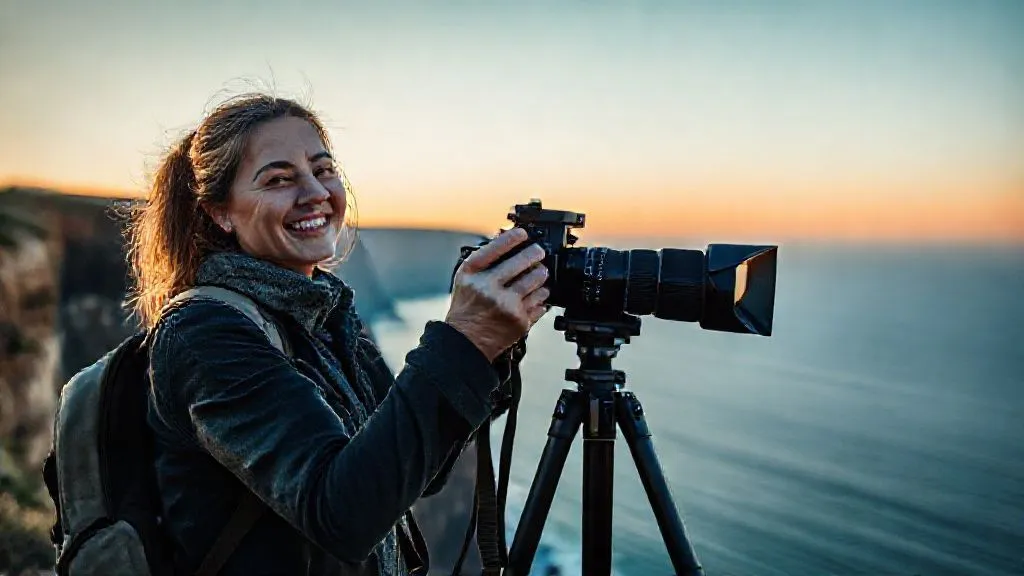
The Tripod: Your Indispensable Travel Companion
A sturdy, yet portable tripod is non-negotiable. I've seen countless solo photographers try to balance their cameras on rocks, ledges, or even trash cans, only to end up with tilted horizons or worse, a damaged camera. Invest in a travel-friendly model.
- Carbon Fiber Tripod: Lightweight and durable, ideal for trekking. Look for models under 3 lbs (1.3 kg) that can support your camera's weight.
- Ball Head: Essential for quick adjustments. Ensure it can hold your camera securely in various angles.
- Compact Size: It should fold down small enough to attach to your backpack without being cumbersome.
Remote Shutter Release: Your Invisible Assistant
Forget the mad dash from camera to pose. A remote shutter release is a game-changer for solo photography. It allows you to trigger your camera from a distance, giving you ample time to compose yourself and achieve natural expressions.
- Bluetooth Remotes: Small, affordable, and compatible with most modern cameras and smartphones.
- Wired Remotes: More reliable in challenging conditions (e.g., extreme cold), but limit your distance.
- Camera App Control: Many mirrorless cameras and DSLRs now have companion apps that turn your phone into a remote control, offering live view and advanced settings adjustments.
"The best camera is the one you have with you, but the best self-portrait tool is a reliable tripod and remote." - An experienced solo photographer's mantra.
Camera Choice: DSLR vs. Mirrorless vs. Smartphone
While a professional-grade DSLR or mirrorless camera offers superior image quality and control, modern smartphones with advanced computational photography can also yield impressive results. The key is understanding their strengths and limitations.
| Gear Type | Pros for Solo Travel | Cons for Solo Travel |
|---|---|---|
| Mirrorless Camera | Excellent image quality, smaller/lighter than DSLR, advanced features (e.g., eye-AF), good video | Higher cost, battery life can be shorter, some lenses are bulky |
| DSLR Camera | Robust build, vast lens selection, long battery life, optical viewfinder | Heavier/bulkier, less advanced video features, often pricier high-end models |
| High-End Smartphone | Extremely portable, always with you, excellent computational photography, easy sharing | Limited optical zoom, smaller sensor (less low-light performance), less manual control, no interchangeable lenses |
Composition & Framing: Elevating Your Solo Shots Beyond Selfies
Professional self-portraits aren't just about being in the frame; they're about being an integral, harmonious part of the scene. This requires a deliberate approach to composition, moving beyond the casual snapshot.
Applying the Rule of Thirds
This fundamental compositional guideline suggests placing your subject (yourself) along the grid lines or at their intersections, rather than dead center. It creates more dynamic and visually interesting images.
- Visualize the Grid: Most cameras and smartphones offer a grid overlay. Use it!
- Place Yourself Off-Center: Experiment with placing yourself on the left or right vertical line, or at one of the four intersection points.
- Use Leading Lines: Roads, rivers, fences—these natural lines can draw the viewer's eye toward you, creating depth and context.
Foreground, Midground, Background: Creating Depth
A common mistake in solo travel photos is a flat image where the subject appears pasted onto the background. Introducing elements in the foreground adds depth and makes the image more immersive.
- Find Natural Frames: Archways, tree branches, windows – these can frame you beautifully.
- Utilize Depth of Field: With a camera, a wider aperture (smaller f-number) can blur the background, making you pop. Even smartphones have 'portrait mode' for this effect.
- Incorporate Movement: Capture yourself walking away, looking out, or interacting with the scene to add narrative.
Harnessing Light: Your Best Friend for Professional Results
Light is the language of photography. Understanding how to use it effectively is paramount for professional-looking self-portraits. Bad light can ruin an otherwise perfect shot, while good light can elevate a simple one.
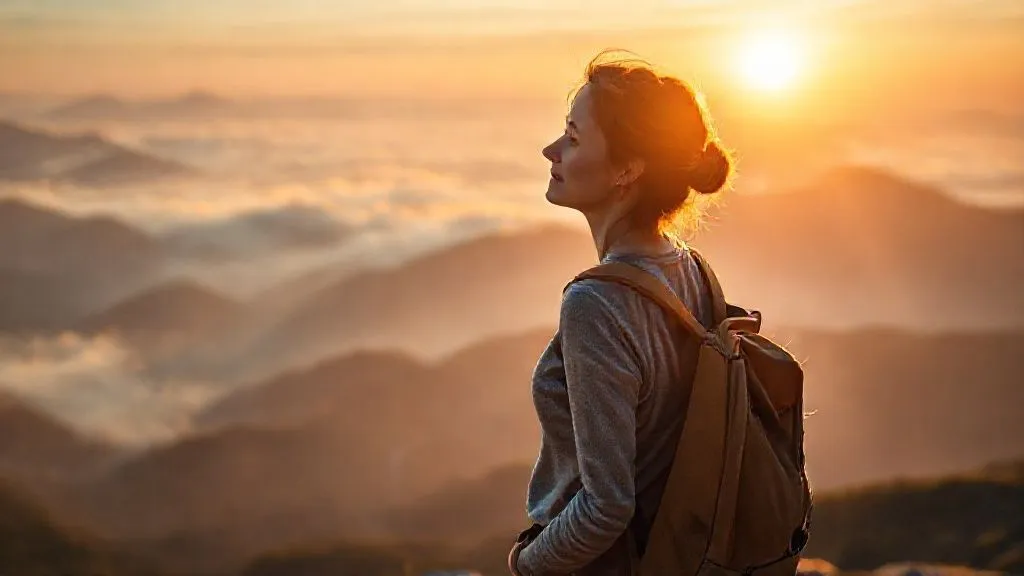
Golden Hour: The Photographer's Magic Time
The hour after sunrise and the hour before sunset, known as 'golden hour,' offers soft, warm, diffused light that is incredibly flattering. It adds a magical glow to your skin and the landscape.
- Soft Shadows: The low angle of the sun creates long, soft shadows that add dimension without harshness.
- Warm Tones: The light has a beautiful golden hue, enhancing natural colors.
- Even Illumination: Less contrast means fewer blown-out highlights or deep, unflattering shadows on your face.
Dealing with Harsh Midday Sun
Sometimes, you can't avoid shooting in the middle of the day. When the sun is high and strong, it creates harsh shadows and overexposed highlights.
- Seek Shade: Position yourself under an overhang, a large tree, or an awning for softer, more even light.
- Backlight Creatively: If you must shoot in direct sun, consider placing the sun behind you for a rim light effect, but be sure to expose for your face (you might need to use exposure compensation or fill flash if available).
- Use a Diffuser (if practical): A small, collapsible diffuser can soften harsh light, though it might be cumbersome for solo travel.
Posing & Expression: Telling Your Story Without a Helper
This is where many solo photographers struggle. Without someone directing you, how do you achieve natural, engaging poses and expressions? It's about preparation and self-awareness.
Pre-Visualization & Practice
Before you even set up your camera, visualize the shot. What story do you want to tell? What emotion do you want to convey? Practice in front of a mirror.
- Research Inspiration: Look at professional travel photography, especially solo shots. Analyze poses, angles, and expressions.
- Develop a Pose Repertoire: Have a few go-to poses that feel natural to you – walking, looking away, interacting with an object, sitting contemplatively.
- Focus on Gaze: Where are your eyes looking? At the camera, off into the distance, at a specific landmark? Your gaze directs the viewer's attention.
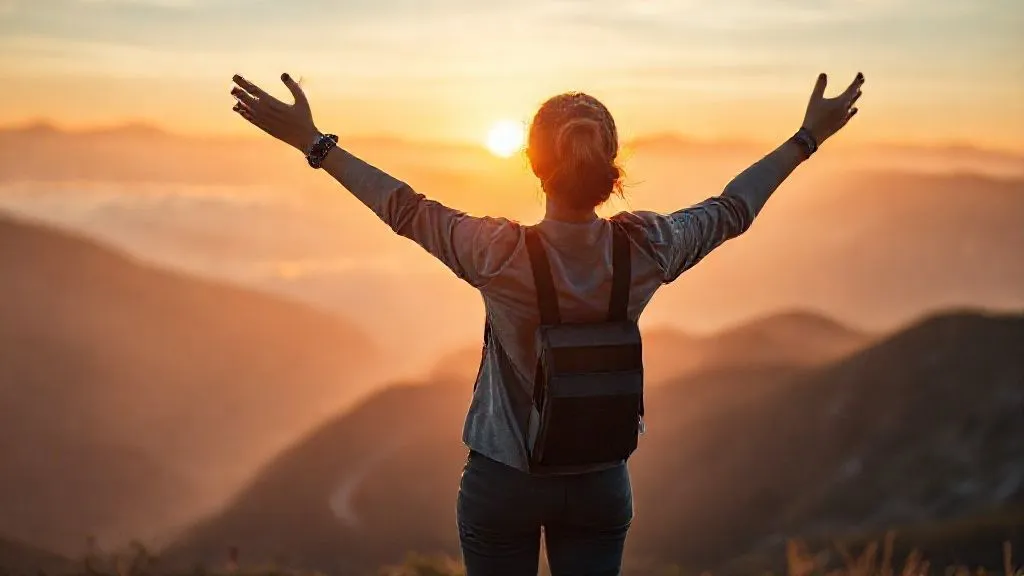
Embracing Natural Movement and Interaction
Stiff, unnatural poses are the bane of self-portraits. Embrace movement and interaction with your environment to create authentic moments.
"Don't just stand there; be there. Interact with your surroundings, and your self-portraits will come alive." - My advice for genuine solo shots.
Case Study: How Maya Captured Her Authentic Self in Peru
Maya, a solo travel blogger, initially struggled with static, awkward self-portraits. Her photos of Machu Picchu, while beautiful, lacked her personal connection. By focusing on interaction and movement, she transformed her approach. Instead of just posing, she set her camera on a tripod overlooking the ancient city, used a remote, and captured herself walking along a path, sitting contemplatively on a stone bench, and looking out at the sunrise. She even incorporated her backpack and hiking poles. This shift from 'posing' to 'being' resulted in a series of powerful, authentic images that resonated deeply with her audience, telling a far more compelling story than her previous efforts.

The Art of the Remote Shutter & Self-Timer: Precision in Solitude
These tools are your best friends in capturing professional self-portraits when traveling solo. Mastering their use will give you control and freedom.
Maximizing Your Self-Timer
While a remote is ideal, the self-timer is a reliable backup. Most cameras offer 2-second and 10-second options.
- The 10-Second Dash: Use the longer timer for shots requiring you to move into position from a distance.
- Burst Mode: If your camera allows, combine the self-timer with burst mode (continuous shooting). This increases your chances of getting a perfect shot by capturing multiple frames.
- Practice Your Run: Know your camera's focus point and practice getting into position smoothly within the timer's window.
Mastering the Remote Shutter
A remote shutter offers unparalleled freedom. It allows you to take multiple shots without moving from your pose, perfecting your expression and subtle movements.
- Line of Sight: Bluetooth remotes usually require a clear line of sight to the camera's receiver. Position yourself accordingly.
- Hide the Remote: For an authentic look, conceal the remote in your hand, behind your back, or under a prop.
- Test Distance: Understand your remote's range. Some work only a few meters, others up to 30 feet or more.
According to a survey by Statista on travel photography accessories, remote shutters and selfie sticks are among the most popular tools for solo travelers aiming for better self-portraits. This highlights their importance in the modern travel photography landscape.
Post-Processing: Refining Your Masterpieces
The raw image is just the beginning. Post-processing is where you fine-tune your self-portraits, enhancing colors, light, and mood to achieve that professional finish. This doesn't mean drastically altering reality, but rather bringing out the best in your capture.
Essential Edits for Impact
Even minor adjustments can make a significant difference. I always recommend a few core edits.
- Exposure & Contrast: Adjust brightness and the difference between light and dark areas.
- White Balance: Correct color casts to make whites look truly white.
- Highlights & Shadows: Recover detail in overexposed or underexposed areas.
- Vibrance & Saturation: Enhance or tone down colors, but avoid over-saturating.
- Sharpening: Add a touch of sharpness to make details pop, especially on your eyes.
Tools of the Trade
You don't need expensive software. Many free or affordable options offer powerful editing capabilities.
- Adobe Lightroom Mobile: Excellent for on-the-go editing, powerful features, and cloud sync.
- Snapseed (Google): Free, intuitive, and feature-rich for mobile editing.
- GIMP: A free, open-source alternative to Photoshop for desktop users.
Safety & Ethics: Responsible Solo Photography
As you become more adept at capturing professional self-portraits when traveling solo, it's crucial to remember your safety and the ethical considerations of photography. Your adventure should always come first, and respect for your environment and its people is paramount.
Prioritizing Personal Safety
Setting up a tripod and focusing on your shot can make you vulnerable. Always be aware of your surroundings.
- Choose Safe Locations: Avoid isolated areas, especially at dawn or dusk, unless you're certain of their safety. Research local crime rates.
- Guard Your Gear: Never leave your camera unattended on a tripod. Even if you're just a few feet away, it can be snatched in seconds. Consider a small, lockable cable to secure your tripod to an immovable object if you step away briefly.
- Be Mindful of Wildlife and Terrain: Don't compromise your safety for a shot. Cliffs, unstable ground, or wild animals are not worth the risk.
Respecting Local Culture and Environment
Your artistic pursuit should never come at the expense of local communities or natural habitats.
"Leave no trace, take only photographs, and respect every culture you encounter." - The traveler's golden rule.
- Ask for Permission: When photographing people, especially in local villages or sacred sites, always ask for permission first. A smile and a gesture often suffice.
- Avoid Disrupting Nature: Stay on marked paths, don't disturb flora or fauna, and certainly don't move or damage natural elements for a better shot.
- Be Discreet: Not every moment needs to be a photoshoot. Sometimes, it's best to simply observe and immerse yourself.
For more on ethical travel photography, resources like National Geographic's guidelines on responsible tourism photography offer excellent insights.
Overcoming Challenges: Troubleshooting Common Solo Portrait Issues
Even with the best preparation, solo photography presents unique hurdles. Here's how to tackle some common problems I've encountered.
Focusing Frustrations
Getting sharp focus when you're not behind the camera can be tricky.
- Pre-Focus Method: Place an object (like your backpack or a water bottle) exactly where you intend to stand. Focus on it, then switch your lens to manual focus (MF) to lock it in.
- Continuous Autofocus (AF-C/AI Servo): If your camera has it, use continuous autofocus with a wide focus area. Some cameras have face/eye detection that works even when you're not directly facing the lens.
- Live View & Zoom: If using a camera app, zoom in on your face in live view to ensure critical sharpness before triggering.
Compositional Conundrums
It's hard to judge composition when you're in the shot.
- Test Shots: Take a few test shots without yourself in the frame to fine-tune the composition and exposure.
- Review Frequently: Walk back to your camera after a few shots to review. Don't wait until you're done with the entire session.
- Wider Angles: When in doubt, shoot a bit wider. You can always crop in post-processing.
A recent study published in the Journal of Travel Research highlighted that technological advancements, particularly in camera autofocus systems and remote control apps, have significantly reduced the technical barriers for solo travelers aiming for high-quality self-portraits, emphasizing the importance of utilizing these features.
Frequently Asked Questions (FAQ)
Q: What's the minimum gear I absolutely need for professional solo self-portraits? A: At a bare minimum, you need a camera (even a good smartphone), a sturdy travel tripod, and a remote shutter release. These three items give you the control and stability necessary for quality shots. Without a tripod, you're severely limited, and without a remote, you'll struggle with natural posing.
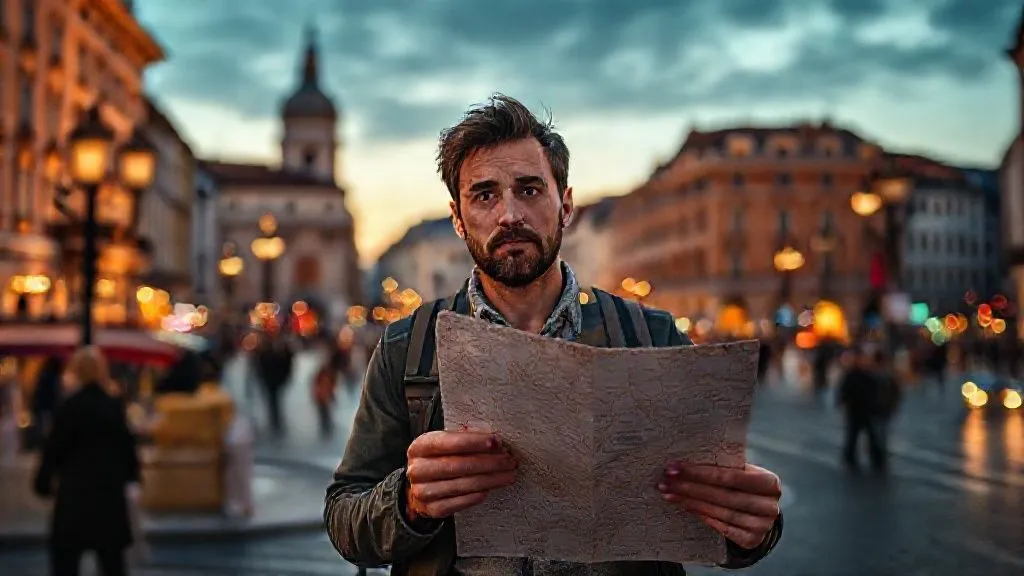
Q: How do I deal with curious onlookers or crowds when trying to take self-portraits? A: This is a common challenge. My best advice is to embrace it or seek solitude. If you're in a busy area, try to shoot early in the morning or late in the evening when crowds are thinner. If people are watching, just smile, be confident, and continue. Often, they're just curious and will move on. Sometimes, I even use it as an opportunity to ask someone to press the shutter for me once I've set up everything, but always be cautious about handing over your gear.
Q: How can I make my self-portraits look natural and not staged? A: The key is to act naturally and interact with your environment. Instead of just striking a pose, try walking, looking out at a view, sipping coffee, or adjusting your backpack. Use burst mode with your remote so you can capture a sequence of movements, then pick the most authentic frame. Don't overthink it; just be present in the moment.
Q: What's the best way to protect my gear while traveling solo? A: Invest in a good quality, padded camera backpack that doesn't scream 'expensive camera inside'. Use weather-sealed gear if you're in challenging climates. Always keep your camera attached to you via a strap when not on a tripod. In crowded areas, keep your backpack in front of you. When leaving your camera on a tripod for a self-portrait, never stray far and always be aware of your surroundings. Consider travel insurance that covers your electronics.
Q: Can I achieve professional self-portraits with just a smartphone? A: Absolutely! Modern smartphones, especially flagship models, have incredible cameras. Focus on the same principles: good lighting (golden hour!), strong composition (rule of thirds), and a stable setup (a small smartphone tripod and a Bluetooth remote are cheap and effective). Utilize portrait mode for background blur, and don't underestimate the power of mobile editing apps. While they might not match a full-frame camera in extreme low light, for most travel situations, they are more than capable.
Key Takeaways and Final Thoughts
- Invest in a Quality Tripod & Remote: These are your essential partners for stability and freedom.
- Master Light & Composition: Understand golden hour and basic rules like the Rule of Thirds to elevate your shots.
- Practice Posing & Movement: Pre-visualize, interact with your environment, and embrace natural expressions.
- Utilize Technology: Leverage camera apps, burst mode, and post-processing tools to refine your vision.
- Prioritize Safety & Ethics: Always be aware of your surroundings and respectful of local cultures and nature.
Capturing professional self-portraits when traveling solo is not just about photography; it's about empowerment, creativity, and documenting your unique journey in a way that truly reflects your experience. It takes practice, patience, and a willingness to experiment, but the results—stunning images that you are an integral part of—are incredibly rewarding. So, pack your gear, set your timer, and go tell your incredible solo story through your lens. The world awaits, and so do your magnificent self-portraits.
Recommended Reading
- 7 Rapid Ways to Uncover Culinary Gems for Executive City Breaks?
- Recharge in 48 Hours: How to Maximize a City Break for Complete Mental Reset
- Unlock Local Secrets: How to Plan a Food Festival Trip Like a True Expert!
- Unlock Budget Travel: Master Meal Prep for International Adventures!
- 7 Smart Ways to Mitigate Overtourism's Impact on Niche Seaside Escapes
Your email address will not be published. Required fields are marked *