
How to Safeguard Professional Camera Gear from Extreme Weather Damage?
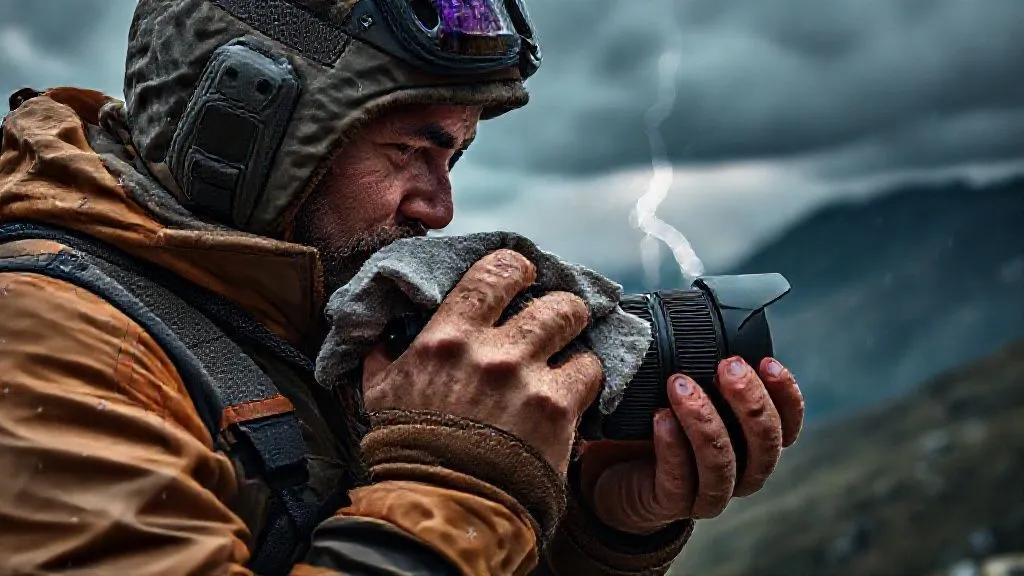
For over two decades navigating the world's most breathtaking and challenging landscapes, from the frosty peaks of Patagonia to the humid depths of the Amazon, I've witnessed firsthand the sheer power of nature – both in its awe-inspiring beauty and its potential for utter destruction. I've seen countless fellow adventurers and professional photographers make the grave mistake of underestimating the elements, leading to irreparable damage to their invaluable camera gear. This isn't just about a broken lens; it's about lost opportunities, ruined projects, and the heartbreaking end to a passion.
The problem is stark: professional camera equipment, while robust, is inherently delicate. Extreme weather conditions – be it torrential rain, biting cold, suffocating humidity, or abrasive sandstorms – can quickly turn a dream shoot into a nightmare. Water ingress can short-circuit electronics, extreme temperatures can drain batteries and cause sensor issues, and fine dust can scratch lenses and sensors, degrading image quality and the longevity of your investment. The financial and emotional toll of such damage is substantial, often costing thousands to repair or replace, not to mention the lost work.
But it doesn't have to be this way. In this definitive guide, I will share my accumulated wisdom and battle-tested strategies to safeguard your professional camera gear from extreme weather damage. We’ll delve into actionable frameworks, real-world scenarios, and expert insights, ensuring you're equipped not just with knowledge, but with the practical steps needed to protect your equipment, no matter how wild the weather gets. Prepare to learn how to keep your gear functioning flawlessly, allowing you to focus on capturing those once-in-a-lifetime shots.
Understanding Your Enemy: The Core Weather Threats
Before we can effectively defend our gear, we must first understand the specific threats posed by different extreme weather conditions. Each element presents unique challenges and requires tailored preventative measures.
Water, Humidity, and Condensation
Water is arguably the most common and insidious threat to camera gear. This isn't just about obvious downpours; it includes high humidity, sea spray, and the often-overlooked danger of condensation. Water can short-circuit electronics, corrode metal components, and foster mold growth on lenses and sensors. Condensation, caused by rapid temperature changes (e.g., moving a cold camera into a warm, humid environment), is particularly dangerous as it forms internally, often unnoticed until it's too late.
Extreme Cold and Heat
Temperature extremes play havoc with electronics and mechanics. In extreme cold, batteries drain rapidly, LCD screens can become sluggish or even freeze, and lubricants in lenses and camera bodies can thicken, affecting performance. Moving parts can become brittle. Conversely, extreme heat can cause internal components to overheat, leading to sensor noise, battery degradation, and even permanent damage. Prolonged sun exposure can also warp plastic parts and degrade rubber seals.
Dust, Sand, and Salt Spray
Invisible yet highly destructive, fine particles of dust and sand are a photographer's bane. They can infiltrate every crevice of your camera body, lenses, and even your sensor, causing scratches during cleaning or interfering with internal mechanisms. Salt spray, common in coastal or marine environments, combines the abrasive nature of particles with the corrosive properties of salt, accelerating damage to metal parts and electronics. A single grain of sand in the wrong place can ruin a sensor.

The First Line of Defense: Protective Gear Essentials
The best defense is often a proactive one, equipping yourself with the right protective gear before you even step into the field. These essentials form the physical barrier against the elements.
Weather-Sealed Bags and Backpacks
Investing in a high-quality, weather-sealed camera bag or backpack is non-negotiable for adventure photographers. Look for bags specifically designed for outdoor use, featuring:
- Water-resistant or waterproof materials: Often Cordura or similar fabrics with DWR (Durable Water Repellent) coatings.
- Sealed zippers: YKK AquaGuard or similar sealed zippers prevent water ingress.
- Rain covers: Many bags include an integrated or detachable rain cover for added protection during heavy downpours.
- Rugged construction: Reinforced seams and durable buckles ensure the bag withstands harsh treatment.
A good bag acts as a mobile fortress for your gear, keeping it dry and protected during transport and when not actively in use.
Rain Covers and Sleeves
For immediate, on-the-fly protection during a sudden downpour, rain covers and sleeves are invaluable. These are typically lightweight, inexpensive, and designed for quick deployment.
- Keep it accessible: Store your rain cover in an easily reachable pocket of your camera bag.
- Practice deployment: Familiarize yourself with how to quickly slip it over your camera and lens. Speed is crucial when weather changes rapidly.
- Consider specialized sleeves: For long lenses or specific camera setups, dedicated waterproof sleeves offer a more tailored fit and better access to controls.

Rugged Cases for Transport and Storage
When transporting your gear in extreme conditions, especially during travel or through rough terrain, nothing beats a rugged hard case. Brands like Pelican or Nanuk are industry standards for a reason.
"A hard case isn't just about protecting against impact; it's an airtight, watertight vault against dust, moisture, and even significant temperature fluctuations during transit. It's the ultimate peace of mind for your most valuable equipment." - Expert Insight
These cases are designed to be crushproof, dustproof, and waterproof, offering unparalleled protection. They are ideal for checked luggage on flights, overland expeditions, or storing gear long-term in less-than-ideal environments.
Mastering Environmental Control: Beyond the Exterior
While external protection is crucial, managing the internal environment of your gear is equally vital, especially regarding humidity and temperature.
Desiccants and Humidity Control
Humidity is a silent killer. Even if your camera never gets wet, persistent high humidity can lead to mold growth on lens elements and sensors, and can slowly degrade electronics. Desiccants absorb moisture from the air.
- Silica Gel Packets: Inexpensive and reusable (can be recharged in an oven), these are perfect for placing inside camera bags, lens cases, and dry boxes.
- Electronic Dehumidifiers: For more permanent storage solutions, a dedicated dry cabinet with an electronic dehumidifier offers precise, consistent humidity control, typically maintaining levels between 35-45% RH (Relative Humidity), which is ideal for electronics.
Regularly checking and replacing or recharging your desiccants is key to their effectiveness. I always carry several large silica gel packets, especially when traveling to tropical climates.
| Method | Pros | Cons | Best Use |
|---|---|---|---|
| Silica Gel Packets | Affordable, portable, reusable (rechargeable) | Limited capacity, requires frequent monitoring/recharging | Small bags, short-term storage |
| Electronic Dehumidifiers (Cabinet) | Consistent, precise humidity control, hands-free | Expensive, requires power, less portable | Long-term storage, high-value gear collections |
| Dry Cabinets (Desiccant-Based) | Passive, low power, very effective | Initial investment, not truly portable | Medium to long-term storage, semi-permanent setups |
Acclimatization Techniques for Condensation Prevention
Condensation occurs when warm, moist air meets a cold surface. This is a common issue when bringing cold gear indoors or from a cold car into a warm tent. Preventing it is simpler than dealing with its aftermath.
- Gradual Temperature Change: When moving from cold to warm, place your camera (still in its bag) into a larger sealed plastic bag (like a Ziploc) before entering the warmer environment. Allow it to slowly warm up to ambient temperature over several hours. The condensation will form on the outside of the plastic bag, not on your gear.
- Keep it in the Bag: If you must move quickly, keep your gear sealed in its bag until it equalizes with the new temperature.
- Avoid Opening: Resist the urge to open lens caps or change lenses until the gear is fully acclimatized.
Battery Management in Extremes
Batteries are particularly susceptible to extreme temperatures.
- Cold Weather: Keep spare batteries warm, ideally in an inside pocket close to your body. Only insert a battery when you're ready to shoot, and swap it out for a warm one if performance drops. Lithium-ion batteries recover some charge when warmed.
- Hot Weather: Avoid direct sunlight on your camera and batteries. Heat accelerates battery degradation and can cause performance issues. Store batteries in a cool, shaded place.
On-Location Best Practices: Preventing Damage in the Field
Even with the best protective gear, how you handle your equipment in the field makes a massive difference in its longevity and performance.
Strategic Bag Packing and Access
Thoughtful packing can minimize exposure to the elements. Organize your bag so frequently used items are easily accessible without exposing the entire contents to rain, dust, or sand. Consider using smaller, individual dry bags or pouches within your main camera bag for extra protection for lenses or accessories.
Lens Changes in Adverse Conditions
Changing lenses in a dusty, wet, or sandy environment is one of the riskiest operations. If possible, avoid it entirely by planning your lens choices. If unavoidable:
- Seek Shelter: Retreat to a tent, vehicle, or under a large umbrella.
- Point Downwards: Hold the camera body pointing downwards to minimize dust or water falling onto the sensor.
- Be Quick: Have your new lens ready. Perform the swap as quickly and smoothly as possible.
- Use a Blower: A rocket blower can dislodge any visible dust from the lens mount before attaching the new lens.
Cleaning Protocols in the Field
Immediate, careful cleaning can prevent minor issues from becoming major problems.
- Dust and Sand: Use a rocket blower to remove loose dust. Avoid wiping with a cloth if sand is present, as this can scratch. For stubborn spots, a lens brush or pen can be used gently.
- Water Droplets: Gently blot (don't wipe) water droplets from the camera body and lenses with a clean, dry microfiber cloth. Pay close attention to seams, buttons, and lens elements.
- Salt Spray: If your gear gets hit by salt spray, a quick, gentle wipe with a very slightly damp (with fresh water) cloth, followed by a dry one, can prevent salt crystal formation, which can be highly corrosive.
For more detailed guidance on cleaning, I recommend consulting resources like B&H Photo's guide on camera and lens cleaning.
Case Study: How Sarah, an Arctic Photographer, Saved Her Gear
Case Study: How Sarah, an Arctic Photographer, Saved Her Gear
Sarah, an intrepid wildlife photographer, was on assignment in the Canadian Arctic, documenting polar bears. One morning, a sudden blizzard rolled in, bringing with it sub-zero temperatures and blinding snow. She was caught far from her base camp with her primary camera setup. Instead of panicking, Sarah remembered her training. She quickly deployed her camera's heavy-duty rain cover, which also offered insulation. Crucially, she had kept her spare batteries in a heated pouch inside her jacket, swapping them out every hour to maintain power. When a critical shot presented itself, she briefly exposed the camera, fired, and immediately tucked it back under her parka, allowing it to slowly re-acclimatize. Upon returning to camp, she meticulously dried her gear, following a strict acclimatization process by placing the camera in a sealed bag within her tent, allowing it to warm up over several hours before opening it. Her diligence meant her gear survived the extreme conditions intact, enabling her to capture stunning, unique images that day.
Post-Shoot Recovery: The Unsung Hero of Gear Longevity
The work doesn't end when the shoot does. Proper post-shoot care is vital for long-term gear health.
Drying and Dehumidifying
Upon returning from a wet or humid environment, never pack away damp gear. Remove batteries and memory cards. Open all compartments, doors, and flaps to allow air circulation. Use a soft, dry cloth to wipe down all surfaces. For internal moisture, place the gear in a dry box with fresh silica gel packets, or in a dedicated dry cabinet. This process can take 24-48 hours, depending on the level of moisture exposure.
Thorough Cleaning and Inspection
Once dry, perform a thorough cleaning and inspection. Use a rocket blower to remove any lingering dust or debris. Check lens elements for smudges, mold, or scratches. Inspect the camera body for any signs of corrosion, especially around ports and buttons. This is also the time to clean your sensor if dust spots are visible in test shots. A clean sensor is critical for image quality and a proactive measure against dust damage.

Storage Solutions
How you store your gear between shoots is as important as how you protect it in the field.
- Controlled Environment: Store gear in a cool, dry place away from direct sunlight and extreme temperature fluctuations.
- Dry Cabinets: For serious photographers with significant investments, a dry cabinet is the gold standard for long-term storage, maintaining optimal humidity levels.
- Airtight Containers with Desiccants: For a more budget-friendly option, airtight plastic containers with regularly recharged silica gel packets provide good protection.
For more insights into long-term storage, check out this guide on Adorama's advice for camera gear storage.
Specialized Challenges and Solutions
Certain environments present unique challenges that require specific considerations.
Saltwater Environments
Saltwater is incredibly corrosive. If shooting near the ocean or on boats:
- Dedicated Waterproof Housings: For underwater or extreme splash zones, a proper underwater housing is essential.
- Immediate Rinse/Wipe: If your gear gets salt spray, gently wipe it down with a cloth dampened with fresh water as soon as possible, then thoroughly dry.
- Seal Check: Regularly check and maintain the rubber seals on weather-sealed bodies and lenses.
High Altitude and UV Exposure
At high altitudes, UV radiation is more intense, and temperatures can fluctuate wildly. Protect your gear from prolonged direct sun exposure to prevent overheating and material degradation. Consider UV filters for lenses, not just for image protection but also for physical lens element protection.
Lightning Safety
While gear protection from lightning is challenging, personal safety comes first. If lightning is a risk, power down your equipment and seek shelter. Avoid holding metal tripods or operating cameras in open fields. Electronic surges from nearby strikes can damage unprotected electronics, even if not directly hit. As a veteran, I can tell you that no shot is worth risking your life.
Insurance and Contingency Planning
Even with the best precautions, accidents happen. This is where a robust contingency plan comes into play.
Understanding Your Policy
Standard home insurance often doesn't cover professional camera gear or damage incurred during professional use, especially in remote locations. Invest in specialized photography insurance that covers theft, accidental damage, and weather-related incidents. Understand your deductible, coverage limits, and any exclusions.
According to a Forbes Advisor article on camera insurance, it's crucial for professional photographers to have a dedicated policy that extends beyond typical homeowners coverage, especially for gear used away from home.
Emergency Repair Kits
A small, well-stocked emergency repair kit can be a lifesaver for minor field repairs or temporary fixes.
| Item | Purpose | Quantity |
|---|---|---|
| Microfiber Cloths | Lens/body cleaning, drying | 3-5 |
| Lens Cleaning Pen/Brush | Dust removal, smudge cleaning | 1 |
| Rocket Blower | Sensor & lens dust removal | 1 |
| Small Screwdriver Set | Minor adjustments, battery door fixes | 1 set |
| Electrical Tape / Gaffer Tape | Temporary seals, minor repairs | 1 roll |
| Zip-lock Bags / Dry Bags | Temporary waterproofing, containing wet items | Assorted |
| Silica Gel Packets | Emergency moisture absorption | 5-10 large |
| Spare Batteries | Power in cold/emergency | 2-3 |
| Small First Aid Kit (for self) | Personal safety | 1 |
Frequently Asked Questions (FAQ)
Question: Can weather-sealed cameras truly withstand any extreme weather? No, 'weather-sealed' is not synonymous with 'waterproof' or 'indestructible'. It means the camera has gaskets and seals to resist light rain, splashes, and dust. They are significantly more resilient than non-sealed cameras but have limits. Submerging a weather-sealed camera or exposing it to prolonged heavy downpours without additional protection is still risky. Always refer to the manufacturer's specific IP rating (Ingress Protection) if available.
Question: How often should I replace or recharge silica gel packets? The frequency depends on the ambient humidity and the volume of air they are protecting. In very humid environments, they might need recharging every few days to a week. In drier climates, they can last weeks or even months. Look for indicator silica gel that changes color (e.g., from orange to green) when saturated, signaling it's time for recharging.
Question: What's the best way to clean a sensor after shooting in dusty conditions? First, use a powerful rocket blower to dislodge loose dust. Hold the camera body face down to let gravity assist. If dust spots persist, a dry sensor cleaning kit (swabs with specialized fluid) is the next step. Only use products specifically designed for sensor cleaning and follow instructions meticulously. If you're uncomfortable, a professional sensor cleaning service is a safer option. Never use compressed air from a can, as it can leave residue and propel dust further into the camera.
Question: Is it safe to use a hair dryer to dry wet camera gear? Absolutely not. A hair dryer produces too much heat, which can damage delicate electronic components, melt plastic parts, or warp lens elements. The forced air can also push water further into crevices. Air drying in a controlled, low-humidity environment with desiccants is the safest method. Patience is key when drying wet gear.
Question: What are the signs of irreversible weather damage to camera gear? Signs include persistent fogging inside lenses or viewfinder, non-functional buttons or dials, erratic electronic behavior (e.g., random shutdowns, error messages), visible corrosion on metal parts, or mold growth on lens elements or sensor. If you notice these, seek professional repair immediately, as early intervention can sometimes mitigate further damage.
Key Takeaways and Final Thoughts
Safeguarding your professional camera gear from extreme weather damage is not just about having the right equipment; it's about cultivating a mindset of preparedness, vigilance, and respect for the elements. As an experienced industry specialist, I've learned that prevention is always easier and less costly than repair.
- Proactive Protection: Invest in high-quality weather-sealed bags, rain covers, and rugged cases.
- Master Environmental Control: Utilize desiccants and acclimatization techniques to combat humidity and condensation.
- Field Discipline: Practice strategic lens changes, swift cleaning, and thoughtful packing on location.
- Post-Shoot Diligence: Never skip the crucial steps of thorough drying, cleaning, and proper storage.
- Plan for the Unexpected: Secure adequate insurance and carry an emergency repair kit.
Your camera gear is an extension of your creative vision and a significant investment. By integrating these strategies into your routine, you empower yourself to tackle any adventure, confident that your equipment will perform when it matters most. Embrace the wild, capture the extraordinary, and know that your gear is protected, allowing your photographic journey to continue, unhindered by the whims of nature.
Recommended Reading
- 7 Steps: Ethically Filming Sacred Rituals & Gaining Community Trust
- Resolving Severe Cultural Conflicts: A Volunteer's Guide to Host Harmony
- Unlocking Authentic Cultural Festival Volunteer Roles: Your Ultimate Guide
- Mastering Meals: How to Prepare Food for Long Train Journeys with Ease
- Rail Pass or Not? Europe Backpacking: Are Rail Passes Worth It?


Your email address will not be published. Required fields are marked *