
Solving Persistent Moisture Damage in Elevated Treehouse Glamping Units?
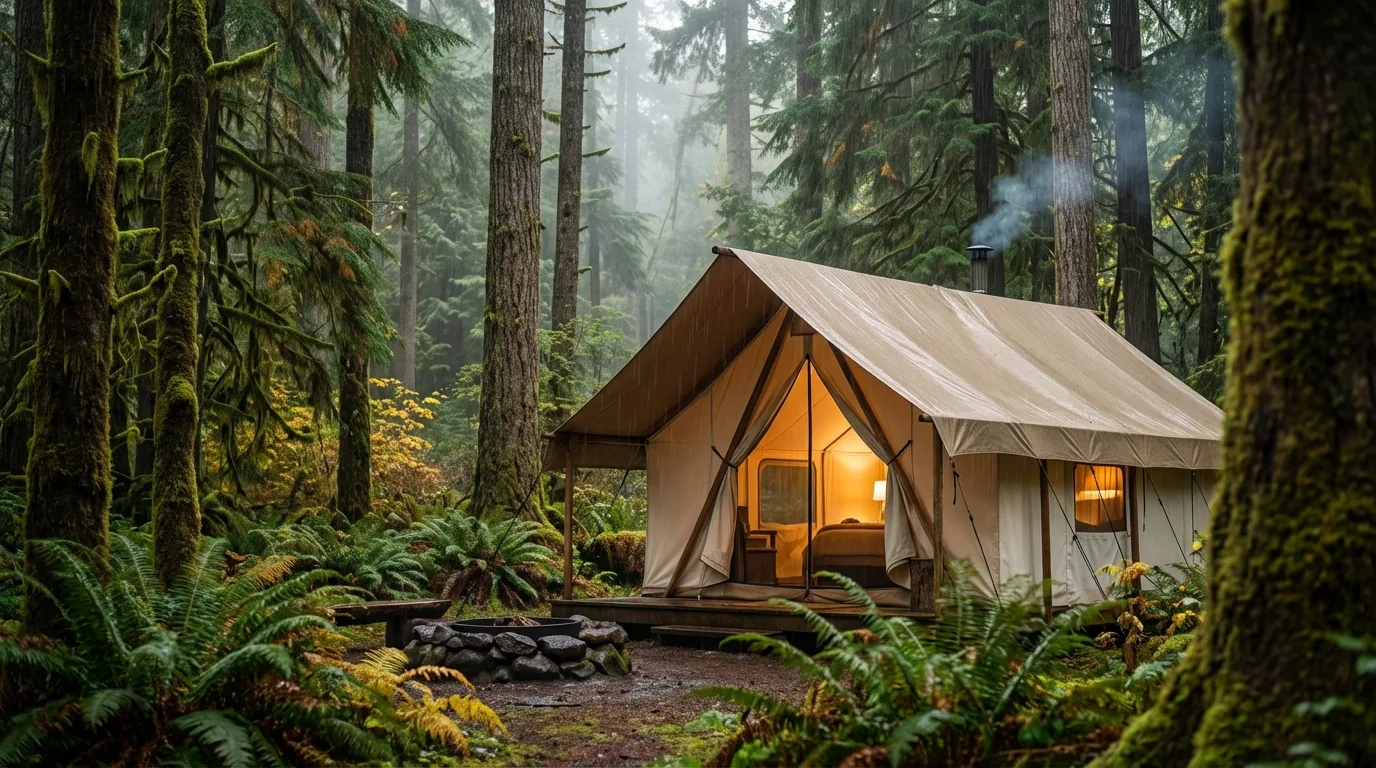
For over two decades in the niche world of glamping, particularly with the rise of breathtaking treehouse accommodations, I've witnessed firsthand the allure and the unique challenges these elevated retreats present. There's an undeniable magic to waking up amongst the leaves, but that magic can quickly dissipate when persistent moisture damage begins to compromise the very structure and comfort of the unit.
The insidious creep of dampness, the tell-tale signs of rot, the musty odor – these aren't just minor inconveniences. They're direct threats to your investment, your guests' experience, and ultimately, your brand's reputation. I've seen countless operators pour their hearts and capital into stunning designs, only to be blindsided by the relentless forces of nature, specifically water ingress, leading to costly repairs and frustrated guests.
This isn't a problem that fixes itself, nor is it one to be ignored. In this comprehensive guide, I'll draw upon my extensive experience to provide you with actionable frameworks, real-world insights, and proven strategies for not just mitigating, but truly solving persistent moisture damage in elevated treehouse glamping units. We'll delve into everything from proactive design choices to advanced material science and diligent maintenance protocols, ensuring your arboreal havens remain dry, durable, and delightful for years to come.
Understanding the Unique Challenges of Elevated Structures
Treehouses aren't cabins on solid ground; their elevation, exposure, and interaction with the living environment introduce a distinct set of moisture-related vulnerabilities. Wind-driven rain, fluctuating humidity levels at canopy height, and the constant movement of the host trees all conspire to challenge conventional building practices.
Gravity, while often our friend in drainage, can also channel water into unexpected crevices. The very air circulation that makes treehouses feel so refreshing can also carry moisture deep into structural elements if not properly managed. Ignoring these fundamental differences is often the first step towards persistent problems.
The Glamping Imperative: Comfort Meets Durability
Unlike a rustic hunting cabin, a glamping treehouse promises luxury and comfort. This means internal finishes, insulation, and electrical systems that are highly susceptible to moisture. A leaky roof or a damp wall doesn't just look bad; it creates an unhealthy environment, damages expensive interiors, and leads to negative reviews that can cripple a business.
Therefore, our approach must be two-pronged: absolute prevention of water ingress and effective management of internal condensation and humidity. It's about creating a sealed, breathable envelope that protects both the structure and its inhabitants.
Proactive Design & Siting: Building Dry from the Start
The battle against moisture is won or lost long before the first guest arrives. It begins with intelligent design and careful siting. I've learned that retrofitting solutions is always more expensive and less effective than getting it right from the outset.
"Prevention is not just better than cure; in the context of treehouse moisture, it's often the only truly sustainable solution."
Consider the microclimate: prevailing winds, sun exposure, and canopy density. A site that looks idyllic might be a wind tunnel for rain or a perpetually shaded, damp hollow. Assess these factors rigorously.

Optimizing Roof Design for Maximum Runoff
The roof is your primary shield. Forget flat roofs in a forest environment. Pitched roofs, with generous overhangs and a minimum slope of 4:12 (ideally steeper), are non-negotiable. This ensures rapid water shedding and protects walls from direct rain impact.
- Generous Overhangs: Extend eaves by at least 24-36 inches on all sides to protect walls and foundations.
- Guttering & Downspouts: Install robust, adequately sized gutters and downspouts. Ensure they drain far away from the treehouse supports to prevent ground saturation and splash-back.
- High-Quality Roofing Materials: Invest in durable materials like standing seam metal roofing, architectural asphalt shingles with a high wind rating, or synthetic slate. Avoid materials prone to moss growth or water retention.
- Underlayment & Ice/Water Shield: Always use a high-quality synthetic underlayment and an ice-and-water shield along eaves, valleys, and penetrations. This is your critical secondary defense.
Advanced Waterproofing & Sealing Techniques
Even with the best roof, walls and penetrations remain vulnerable. This is where meticulous attention to detail in sealing becomes paramount. I've seen countless leaks traced back to poorly flashed windows or unsealed utility penetrations.
The Building Envelope: A Multi-Layered Approach
Think of your treehouse as a boat in a constant storm. Every seam, every joint, every opening needs to be watertight. This requires a systems-based approach, not just individual components.
- House Wraps & Rain Screens: Install a high-performance, vapor-permeable house wrap over your sheathing. Even better, incorporate a rain screen system. This creates a small air gap between the siding and the house wrap, allowing any moisture that penetrates the siding to drain away harmlessly.
- Flashing, Flashing, Flashing: This is the unsung hero. Proper flashing around windows, doors, vents, and any other penetration is crucial. Use self-adhering flashing tapes in conjunction with metal flashing. Always integrate flashing into the building envelope in a shingle-lap fashion, directing water outwards.
- Sealants & Caulking: Use high-quality, flexible, UV-resistant sealants (e.g., polyurethane or silicone) for all seams, joints, and transitions. Don't skimp on quality here; cheap caulk fails quickly.
- Foundation & Support Sealing: Where the treehouse connects to its supports (trees, posts), ensure robust, flexible sealing that can accommodate movement. This is often an overlooked area for water ingress.

Case Study: How 'Canopy Retreats' Eliminated Wall Leaks
Case Study: How Canopy Retreats Eliminated Wall Leaks
Canopy Retreats, a luxury glamping operation in the Pacific Northwest, faced persistent wall leaks in three of their older treehouse units. Despite repeated re-caulking, water continued to find its way in, damaging interior finishes and leading to guest complaints. After bringing in a building envelope specialist (a role I often fill), we identified the root cause: inadequate flashing around windows and a lack of a proper rain screen system.
Our solution involved carefully removing the existing siding, installing a dimpled rain screen membrane, and re-flashing all windows and doors with a combination of self-adhering butyl flashing tapes and custom metal flashing. The siding was then reinstalled. This comprehensive approach, though initially more costly, completely eliminated the leaks. The initial investment in proper flashing and a rain screen system paid for itself within two seasons by preventing further damage and ensuring continuous bookings.
Ventilation & Humidity Control: The Internal Battle
Even if you keep all external water out, internal moisture can still cause significant damage. Cooking, showering, and even human respiration generate considerable humidity. Without proper ventilation, this moisture condenses on cooler surfaces, leading to mold, mildew, and rot.
According to a study by the U.S. Environmental Protection Agency (EPA), controlling indoor humidity below 60% is crucial for mold prevention. In a treehouse, this is especially critical.
Strategies for Internal Moisture Management
- Adequate Exhaust Fans: Install powerful, quiet exhaust fans in bathrooms and kitchens, vented directly to the exterior. Ensure they are used consistently.
- Passive Ventilation: Incorporate passive vents (e.g., soffit and ridge vents, or strategically placed operable windows) to encourage natural airflow. Cross-ventilation is key.
- Dehumidifiers: In particularly humid climates or during certain seasons, a small, energy-efficient dehumidifier can be invaluable. Consider smart dehumidifiers that can be controlled remotely.
- Vapor Barriers: In colder climates, a vapor barrier on the warm side of the insulation (typically the interior) is essential to prevent moisture migration into wall cavities where it can condense. Consult local building codes for specific requirements.
| Moisture Source | Primary Defense | Secondary Defense |
|---|---|---|
| Rain/Snow | Roofing, Flashing, Siding | House Wrap, Rain Screen |
| Ground Moisture (Splash-back) | Overhangs, Gutters, Grading | Sealed Supports, Durable Cladding |
| Internal Humidity | Exhaust Fans, Dehumidifiers | Vapor Barrier, Passive Vents |
| Condensation (Internal) | Insulation, Air Sealing | Ventilation, HVAC |
Material Selection: Durability in the Face of Dampness
The materials you choose for your treehouse glamping unit play a monumental role in its long-term resistance to moisture. Investing in high-quality, moisture-resistant materials upfront is a wise decision that saves significant costs down the line.
Wood Treatment & Alternatives
While wood is intrinsically linked to treehouses, not all wood is created equal when it comes to moisture resistance. Pressure-treated lumber, naturally rot-resistant species, and composite materials offer superior performance.
- Pressure-Treated Lumber: Essential for structural elements exposed to weather or ground contact. Ensure it's rated for its intended use.
- Naturally Durable Woods: Species like cedar, redwood, cypress, and black locust possess natural resistance to rot and insects due to their inherent oils. These are excellent choices for siding, decking, and trim.
- Composite Materials: For decking and exterior trim, high-quality wood-plastic composites or fiber cement boards offer exceptional moisture resistance with minimal maintenance.
- Marine-Grade Plywood: For sheathing in particularly exposed areas, marine-grade plywood offers enhanced water resistance compared to standard exterior-grade plywood.
As renowned architect Frank Lloyd Wright famously said, "Study nature, love nature, stay close to nature. It will never fail you." But we must also learn from nature's challenges and build to withstand them.
Regular Inspections & Proactive Maintenance Program
Even the best-built treehouse will succumb to moisture damage if not regularly inspected and maintained. A proactive maintenance schedule is your final, crucial line of defense. This isn't just about fixing problems; it's about identifying potential issues before they escalate.
Establishing a Robust Maintenance Protocol
I recommend a quarterly inspection schedule, with more frequent checks after severe weather events. Train your staff on what to look for, or better yet, hire a specialist.
- Roof & Gutter Checks: Clear gutters and downspouts of leaves and debris. Inspect roofing for damaged shingles, missing sealant, or signs of wear. Check flashing around chimneys, vents, and skylights.
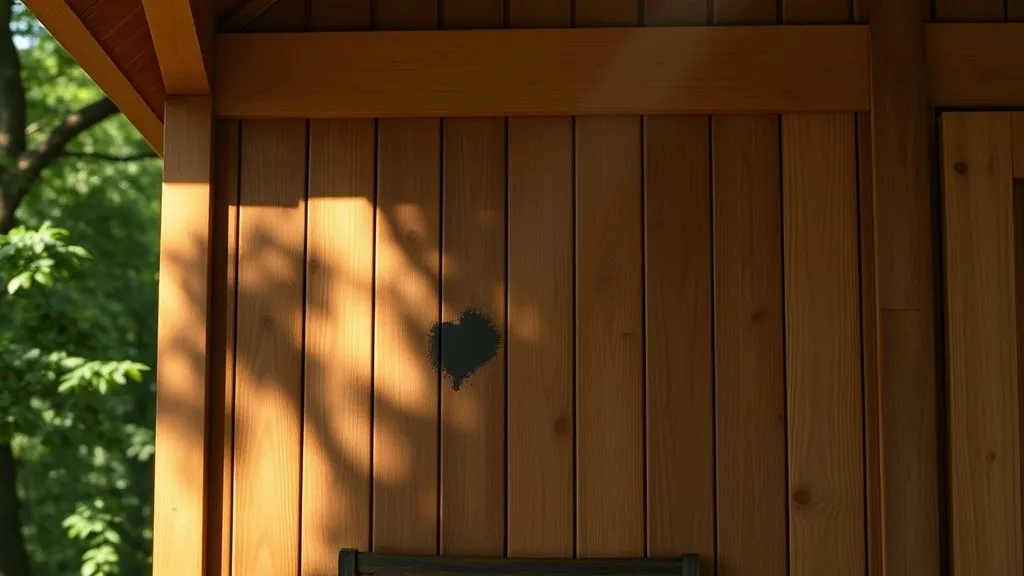
- Exterior Wall Inspection: Look for cracks in siding, peeling paint, gaps in caulk joints, or any signs of water staining. Pay close attention to areas around windows, doors, and utility penetrations.
- Foundation & Supports: Inspect tree attachments, posts, and anchors for signs of rot, loose connections, or water pooling. Ensure proper drainage around the base of supports.
- Interior Assessment: Check ceilings, walls, and floors for discoloration, soft spots, musty odors, or signs of mold. Pay particular attention to bathrooms, kitchens, and areas around windows.
- Ventilation Systems: Ensure all exhaust fans are clean and functioning properly. Clean or replace dehumidifier filters.
"A small leak ignored is a catastrophic repair waiting to happen. Diligence in maintenance is the hallmark of a responsible glamping operator."
Consider implementing a digital checklist system that staff can use during inspections, complete with photo uploads for documentation. This creates accountability and a historical record.
Addressing Existing Moisture Damage: Repair & Remediation
If you're reading this because you already have persistent moisture damage, don't despair. While prevention is ideal, effective remediation is possible. The key is thoroughness and understanding the extent of the problem.
The Remediation Process: A Step-by-Step Guide
- Identify the Source: This is the most critical step. A moisture meter can help trace water paths. Don't just treat the symptom; find and fix the root cause of the leak or dampness.
- Containment & Safety: If mold is present, implement containment measures to prevent spores from spreading. Use appropriate PPE (respirators, gloves, eye protection).
- Remove Damaged Materials: Cut out and safely dispose of all moldy, rotted, or water-damaged materials (insulation, drywall, wood, flooring). Ensure the area is completely dry before proceeding.
- Treat & Clean: Clean remaining surfaces with an antimicrobial solution. For significant mold, professional remediation may be necessary.
- Dry Thoroughly: Use fans and dehumidifiers to ensure the affected area is completely dry before any repairs begin. This can take several days.
- Repair & Rebuild: Replace damaged structural components with new, treated, or naturally resistant materials. Reinstall insulation, vapor barriers, and interior finishes, ensuring all waterproofing best practices discussed earlier are followed.
- Prevent Recurrence: Implement the proactive measures outlined in this article (improved flashing, better ventilation, etc.) to ensure the problem doesn't return.
For more detailed guidelines on mold remediation, refer to the Centers for Disease Control and Prevention (CDC) resources.
Embracing Smart Technology for Environmental Monitoring
In today's world, technology offers powerful tools to help us stay ahead of moisture problems. Smart sensors can provide real-time data, allowing for immediate intervention rather than reactive repairs.
Leveraging IoT for Treehouse Health
- Wireless Moisture Sensors: Place these in vulnerable areas (e.g., under sinks, near windows, in wall cavities) to detect leaks or elevated humidity levels instantly. Many systems can send alerts to your phone.
- Smart Thermostats & Dehumidifiers: Integrate these into a central system to monitor and control indoor climate conditions remotely. This allows you to maintain optimal humidity levels even when units are vacant.
- Environmental Monitoring Stations: Some advanced systems can track external conditions like rainfall, wind direction, and ambient humidity, providing valuable context for internal readings.
This proactive monitoring can be a game-changer, allowing you to address a minor issue like a spike in humidity before it turns into a major mold problem. For further reading on smart building technology, consider resources from organizations like the American Society of Heating, Refrigerating and Air-Conditioning Engineers (ASHRAE).
Frequently Asked Questions (FAQ)
What are the most common entry points for moisture in elevated treehouse glamping units? In my experience, the most common entry points are improperly flashed windows and doors, poorly sealed roof penetrations (vents, skylights), inadequate roof overhangs allowing rain to hit walls directly, and compromised seals where the treehouse connects to its supporting structures or trees. Internal condensation due to insufficient ventilation is also a major contributor.
How can I tell if I have a hidden moisture problem before visible damage appears? Early indicators include a persistent musty odor, unexplained increases in indoor humidity, peeling paint or wallpaper, subtle discoloration on walls or ceilings, or a sudden increase in respiratory issues among guests. Using a non-invasive moisture meter during routine inspections can also help detect elevated moisture levels within walls or floors before they become visible problems.
Is it possible to make a treehouse completely waterproof? While 'completely waterproof' is a challenging ideal, especially with living trees involved, it's absolutely possible to make a treehouse highly resistant to water ingress and manage internal moisture effectively. The goal is to create a robust, multi-layered building envelope that sheds water efficiently, seals against wind-driven rain, and allows for proper ventilation and humidity control. It requires meticulous design, high-quality materials, and diligent maintenance.
What's the role of tree movement in moisture damage, and how can it be mitigated? Tree movement, especially swaying in wind, can stress structural connections and compromise seals and flashing over time. Mitigation involves using flexible tree attachment methods (e.g., Treehouse Attachment Bolts or floating connections), designing for slight movement, and utilizing flexible, high-performance sealants that can withstand this dynamic environment. Regular inspection of these connection points is critical.
When should I call in a professional for moisture damage? You should definitely call a professional if you suspect structural damage, if the mold growth covers an area larger than 10 square feet, if you experience persistent leaks despite your best efforts, or if you are unsure about the source of the moisture. Professionals have specialized equipment (like thermal cameras and advanced moisture meters) and expertise in identifying hidden issues and safely remediating extensive damage.
Key Takeaways and Final Thoughts
- Proactive Design is Paramount: Address moisture at the blueprint stage with proper roof design, generous overhangs, and smart siting.
- Seal Every Vulnerability: Master flashing and sealing techniques for every penetration and joint in the building envelope.
- Manage Internal Humidity: Prioritize ventilation and consider dehumidification to combat condensation and indoor moisture sources.
- Invest in Durable Materials: Choose rot-resistant woods, composites, and high-performance roofing and siding.
- Implement a Rigorous Maintenance Program: Regular inspections and timely repairs are non-negotiable for long-term protection.
- Embrace Smart Technology: Utilize sensors and smart climate control to monitor and proactively manage your treehouse environment.
Solving persistent moisture damage in elevated treehouse glamping units isn't a one-time fix; it's an ongoing commitment to excellence, born from a deep understanding of unique challenges and a dedication to proven strategies. By adopting these expert insights and actionable frameworks, you're not just protecting your investment; you're safeguarding the magical experience you promise your guests, ensuring your arboreal retreats remain dry, delightful, and durable for many seasons to come. Your glamping units are more than structures; they are sanctuaries, and keeping them pristine is the ultimate testament to your craft.
Recommended Reading
- 7 Proven Steps: How to Reliably Vet Truly Barrier-Free Accessible Travel?
- Unveiling the Health Effects of Lunar Tourism: Are You Ready for Space?
- The Ultimate Guide: Unlocking Adventurous Family Travel with Toddlers
- Unlock Europe: The Ultimate Guide to Interrail Travel Days Explained
- Unlock Your Dream: How to Get Free Volunteer Teaching Placements

Your email address will not be published. Required fields are marked *