
Urgent Fixes for Aurora Photography Gear Failure in Extreme Cold?
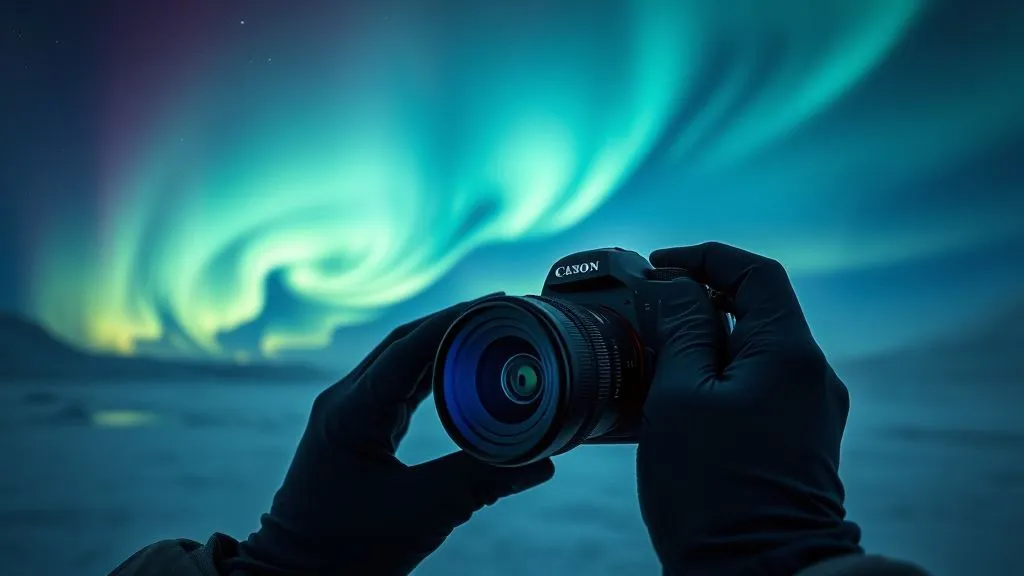
For over 15 years, I've chased the Northern Lights across the Arctic Circle, witnessing some of nature's most spectacular displays. But I've also seen countless dreams turn into frozen nightmares when sophisticated photography gear succumbs to the brutal, unforgiving cold. The thrill of the chase, the perfect shot framed, only for a battery to die instantly, a lens to fog irrevocably, or a shutter to simply freeze solid.
The problem is profound: modern cameras, designed for temperate climates, are simply not built to withstand sustained exposure to -20°C or colder. This isn't just an inconvenience; it's a potential loss of once-in-a-lifetime memories, a wasted journey, and a significant investment rendered useless. The frustration, the panic, the sheer helplessness – I know it all too well, both from personal experience and from guiding countless photographers.
This guide isn't just a collection of tips; it's a survival manual, born from years of trial, error, and hard-won lessons under the dancing lights. You'll learn not just what to do when your gear fails in extreme cold, but the underlying principles behind those failures, equipping you with actionable, expert-backed strategies to fix urgent issues and prevent them from ruining your aurora photography adventure. Let's turn potential disaster into stunning success.
Understanding the Arctic Assault: Why Gear Fails
Before we dive into fixes, it's crucial to understand the enemy. Extreme cold isn't just 'cold'; it's a multi-faceted assault on your electronics, mechanics, and optics. Ignoring these fundamental principles is like going to battle without knowing your opponent's weaknesses.
The Triple Threat: Cold, Condensation, and Battery Drain
Firstly, the sheer cold affects everything. Lubricants in lenses and camera bodies thicken, causing mechanisms to slow or seize. LCD screens become sluggish or completely unresponsive. Plastic components become brittle, prone to snapping under stress. Metal parts shrink, potentially leading to misalignments.
Secondly, condensation is the silent killer. When you bring a cold camera into a warmer environment (like a heated vehicle or cabin), the moisture in the air instantly condenses on and inside your gear. This can short-circuit electronics, corrode components, and fog lenses from the inside out. It's a risk often underestimated, but its consequences are severe.
Finally, battery drain is perhaps the most common and frustrating issue. Lithium-ion batteries, standard in most modern cameras, lose their charge capacity dramatically in freezing temperatures. What might last hours in mild conditions could vanish in minutes when the mercury plummets. This isn't a fault; it's a fundamental chemical property, as detailed in various scientific studies on battery performance in extreme conditions.
Identifying the Early Warning Signs
Learning to recognize the subtle cues of impending gear failure can save your shoot. I've found that paying close attention to these indicators is key:
- Sluggish LCD: If your camera's screen is refreshing slowly or becoming dim, your battery is struggling, and internal components are feeling the cold.
- Stiff Controls: Buttons, dials, and zoom/focus rings that feel unusually hard to turn or press are signs that lubricants are thickening.
- Faster Battery Drain: If your battery indicator drops precipitously faster than usual, it's a clear signal the cold is taking its toll.
- Intermittent Operation: Your camera might work for a few minutes, then stop, then restart. This often points to internal condensation or a dying battery struggling to deliver consistent power.
Emergency Power Strategies: When Batteries Die Fast
A dead battery is the most common reason for a Northern Lights shoot to end prematurely. I've seen it happen countless times, and often, a quick, intelligent fix can get you back in action.
The Warmth Trick: Reviving Cold Batteries
This is my go-to urgent fix. When a battery dies in the cold, it's often not truly 'dead' but simply too cold to deliver power efficiently. Its internal chemistry slows down. The solution? Warm it up. Immediately remove the 'dead' battery from your camera and place it somewhere warm, but not hot. My preferred spots are:
- Inner Pocket: Against your body, inside your warmest jacket. Your body heat is gentle and consistent.
- Hand Warmer Pouch: If you have chemical hand warmers, put the battery in a small pouch (like a spare sock) with a hand warmer. Do NOT place the hand warmer directly on the battery; the direct heat can be too intense.
Keep a spare, warm battery ready. I always carry at least three fully charged batteries in an inner jacket pocket. As one battery starts to fail, I swap it out for a warm one and immediately place the 'dead' one into my inner pocket to revive it. This rotation can extend your shooting time significantly.
External Power Banks: Not All Are Created Equal
While power banks are lifesavers, they too suffer in the cold. A standard power bank will lose efficiency, and some might even shut down completely. For aurora photography, you need ruggedized, low-temperature-rated power banks. These are often designed with better insulation and chemistry to perform in sub-zero conditions. If your camera supports USB charging while operating, a warm power bank (kept in an inner pocket) can provide vital supplementary power. Always test this setup before heading out.

Combating Lens Fogging and Frost: Maintaining Clarity
A clear lens is non-negotiable for aurora photography. Fogging and frost can appear suddenly and are incredibly frustrating. I've learned that prevention is always better than cure, but urgent fixes exist.
The Gradual Acclimatization Method
This isn't an 'urgent fix' but a crucial preventative measure that often negates the need for one. When moving your camera from extreme cold to a warmer environment (e.g., car, cabin), condensation is inevitable. To prevent this, place your camera (with lens attached) inside a sealed plastic bag (like a Ziploc or even a garbage bag) *before* bringing it inside. Remove as much air as possible. Allow the camera to warm up slowly to room temperature inside the bag. This can take an hour or more. The condensation will form on the *outside* of the bag, not on your precious gear. Once the camera is warm, you can remove it safely.
Chemical Desiccants and DIY Warmers
If you're already out and your lens fogs internally, the situation is dire. External fogging can be wiped away carefully with a microfibre cloth, but internal fogging requires patience. If you suspect internal condensation (often visible as a hazy film that won't wipe off), your best bet is to remove the lens (if safe to do so in the cold, away from blowing snow), place it in a sealed bag with silica gel packets, and bring it to a slightly warmer (but still cold) environment, like a vestibule, to slowly dry out. This is a slow fix, not an urgent one for the field.
For external frost, a gentle wipe with a very soft, clean lens cloth can sometimes work, but be extremely careful not to scratch the lens. For minor external fogging, a small, low-heat hand warmer taped (not directly touching!) to the lens barrel can help dissipate it, but this is a delicate balance. I've used lens 'dew heaters' designed for telescopes with success, powered by a separate battery pack, but these are preventative, not reactive.
Expert Insight: Never breathe on your lens to clear fog. Your warm, moist breath will instantly create more frost, making the problem worse and potentially leaving residue.

Camera Body Malfunctions: From Frozen Buttons to Shutter Lock
The camera body itself is a complex machine, and extreme cold can wreak havoc on its delicate mechanics and electronics. I've encountered everything from unresponsive buttons to outright shutter lock. These are often the most alarming failures.
Gentle Warming and Moisture Removal
If buttons or dials become stiff or unresponsive, it's usually due to lubricants thickening or internal components shrinking slightly. The immediate fix is gentle warming. Similar to batteries, placing the camera body (without lens, if possible, to allow better air circulation) in an inner pocket can help. Avoid rapid heating, as this invites condensation. If you have access to a slightly warmer, dry environment (like a tent vestibule or a vehicle that's been running for a while), place the camera there in a sealed bag with silica gel for a gradual warm-up. This process needs patience.
The Emergency Hand Warmer Pouch
For more localized issues, like a frozen shutter or a specific button, a small chemical hand warmer can be a temporary savior. Place the camera inside a thick sock or small cloth bag, and then add a hand warmer next to the affected area (again, not directly touching the camera body). This provides localized, gentle heat. Monitor closely to ensure it doesn't get too warm. This method has saved several shoots for me when a shutter refused to fire.
Case Study: Sarah's Shutter Lock Scare in Lapland
Sarah, an aspiring aurora photographer I was guiding in Finnish Lapland, faced a terrifying moment. After nearly an hour of shooting at -28°C, her camera's shutter suddenly locked mid-exposure. The camera body was unresponsive, and the LCD was blank. Panicked, she thought her trip was ruined. I advised her to immediately remove the battery, place both the battery and the camera body (wrapped in a spare scarf) into a large Ziploc bag with two activated hand warmers, and tuck the bag inside her inner jacket. After about 20 minutes of walking, we stopped. She retrieved the camera, inserted the now-warm battery, and to her immense relief, the camera powered on, and the shutter fired perfectly. The gentle, gradual warming and isolation from external moisture had saved her night, allowing her to capture some truly breathtaking aurora shots.
Tripod Troubles: Stiff Joints and Frozen Legs
A stable tripod is fundamental for aurora photography. Yet, tripods are often overlooked in cold weather preparedness. I've wrestled with countless frozen tripod legs and seized ball heads, and they can be just as frustrating as camera malfunctions.
Lubrication and Careful Handling
The most common issue is stiff leg locks and ball head mechanisms. The lubricants inside these components thicken, making them incredibly difficult to adjust. If your tripod is already stiff, try to work the joints gently. Rapid, forceful movements can break brittle plastic components. For leg locks, try to warm them slightly with your gloved hands. For ball heads, if you can, try to rotate the ball gently to spread any remaining lubricant. In extreme cases, a very small amount of cold-weather-rated lubricant (e.g., silicone-based, non-freezing) applied sparingly to exposed moving parts can help, but this is a preventative measure, not an urgent field fix.
Preventative Measures Before the Shoot
The best 'fix' for a frozen tripod is prevention. Before heading out, extend and retract all leg sections several times to ensure they move freely. If you have a tripod with twist locks, ensure they are clean and not gritty. For ball heads, ensure the locking mechanism moves smoothly. If your tripod is metal, consider wrapping the upper leg sections with foam grips or pipe insulation to prevent your hands from freezing to it.
Memory Card & Data Loss Prevention in the Cold
What's the point of fixing your gear if your precious aurora images are lost or corrupted? Memory cards, while robust, are not immune to the cold's effects. I've seen cards refuse to read or even corrupt data when mishandled in frigid conditions.
Keeping Cards Warm and Dry
Like batteries, memory cards perform best when kept warm. I always store my spare memory cards in a small, waterproof pouch inside an inner jacket pocket. This ensures they are warm and dry when I need to swap them out. Inserting a freezing cold card into a warm camera can cause condensation inside the camera body, which is a significant risk.
The Immediate Backup Protocol
This is less of an urgent 'fix' and more of an urgent 'prevention of disaster.' If you have a laptop or a portable hard drive (preferably ruggedized and cold-rated) with you, back up your photos as soon as you get back to a warmer environment. However, remember the condensation rule: allow your camera and cards to acclimatize *inside a sealed bag* before connecting them to a warmer device. This prevents moisture from forming on the card or inside your card reader, which could lead to corruption or short circuits. According to SanDisk's whitepapers on storage in extreme weather, careful handling during temperature transitions is paramount.
| Gear Item | Urgent Fix | Preventative Step |
|---|---|---|
| Camera Body | Gentle body heat, hand warmer pouch (indirect) | Acclimatize slowly, keep warm when not in use |
| Batteries | Inner jacket pocket, hand warmer pouch (indirect) | Carry spares, keep warm, use low-temp power bank |
| Lens Fogging/Frost | Microfibre cloth (external), desiccant (internal) | Acclimatize in sealed bag, use dew heater |
| Tripod | Gentle manipulation, localized warming | Lubricate, check movement, foam grips |
| Memory Cards | Keep warm, don't swap cold cards into warm camera | Store in warm, dry pouch, immediate backup |
Beyond the Fix: Essential Cold Weather Photography Prep
While urgent fixes are crucial, the true mark of an experienced aurora photographer is the ability to minimize the need for them through meticulous preparation. I've developed a philosophy over the years that prioritizes proactive measures.
The "Kit within a Kit" Philosophy
Think of your aurora gear not as a single unit, but as several interdependent systems, each needing its own cold-weather specific preparation. Your battery kit needs its own warming system. Your lens kit needs its own anti-fogging strategy. Your camera body needs its own protective cocoon. This means:
- Dedicated Battery Pouch: A small, insulated pouch for spare batteries, perhaps with a hand warmer.
- Lens Cleaning & Anti-Fog Kit: Always carry a soft brush, microfibre cloths, and a small sealed bag with silica gel.
- Protective Covers: Rain covers or even simple plastic bags can offer an extra layer of wind and snow protection.
- Tool Kit: A small multi-tool for minor adjustments, especially for tripods.
Personal Preparedness: Your First Line of Defense
Ultimately, your ability to fix gear in extreme cold hinges on your own well-being. If your hands are numb, your fingers are clumsy, and your focus is on staying warm, you won't be able to effectively troubleshoot or repair your camera. As an expert, I cannot stress this enough: invest in high-quality, layered clothing, insulated gloves (with finger access for camera controls), warm boots, and headwear. Staying comfortable and alert allows you to make clear-headed decisions and execute delicate tasks with frozen fingers. Your personal comfort is directly proportional to your gear's survival and your photographic success.
. Cinematic lighting, sharp focus on the photographer and gear, depth of field. 8K hyper-detailed, shot on a high-end DSLR.")
Frequently Asked Questions (FAQ)
Q: Can I use my phone for aurora photography in extreme cold? A: While modern smartphones have impressive cameras, they are even more susceptible to battery drain and performance issues in extreme cold than dedicated cameras. Their touchscreens often become unresponsive with thick gloves, and their smaller sensors struggle with low-light conditions. While you might get a casual shot, for serious aurora photography, a dedicated camera is always preferred, with all the precautions mentioned above.
Q: How long can my camera last in sub-zero temperatures before issues arise? A: This varies significantly by camera model, battery type, and the exact temperature. Generally, most cameras will start showing signs of sluggishness below -10°C (14°F). Below -20°C (-4°F), issues like rapid battery drain, stiff controls, and LCD slowdown become very common within 30-60 minutes. Proper insulation and battery management can extend this, but sustained exposure without protection will inevitably lead to problems.
Q: Is it safe to use hand warmers directly on my camera or lens? A: No, absolutely not directly. Direct contact with activated chemical hand warmers can generate too much localized heat, potentially damaging delicate electronics or optics, or even causing condensation when removed. Always place a barrier (like a cloth, sock, or wrap) between the hand warmer and your gear, and use them for gentle, indirect warming inside a pouch or pocket.
Q: What's the best way to clean a frozen lens without damaging it? A: The safest method is to bring the camera and lens into a sealed bag, allow it to slowly acclimatize and warm up fully to room temperature. Once all frost and condensation have dissipated naturally (which can take hours), then use a soft lens brush and a clean microfibre cloth to gently clean any residue. Never rub or wipe a frosted lens, as ice crystals can act as abrasives and scratch the coating.
Q: Should I leave my camera outside overnight to avoid condensation? A: While it might seem logical, leaving your camera exposed to extreme cold and potentially snow or moisture overnight is a high-risk strategy. It exposes your gear to prolonged stress, potential moisture ingress, and theft. The best practice is to bring your camera indoors using the sealed bag acclimatization method and store it safely. If you must leave it out, ensure it's in a waterproof, insulated case, but this is generally not recommended for extended periods.
Key Takeaways and Final Thoughts
- Prevention is Paramount: The best fix is to avoid the problem. Proactive warming, careful acclimatization, and protective measures are your first line of defense.
- Warmth is Your Ally: Body heat, insulated pouches, and indirect hand warmers are crucial for batteries, lenses, and camera bodies.
- Patience is a Virtue: Rapid temperature changes are the enemy. Allow gear to warm up slowly in sealed bags to prevent condensation.
- Know Your Gear: Understand how your specific camera and lens respond to cold and test your preventative measures before the main event.
- Prioritize Personal Comfort: A warm, alert photographer is better equipped to handle gear emergencies.
Chasing the Northern Lights is an extraordinary experience, and capturing its magic through your lens is incredibly rewarding. While gear failure in extreme cold can be disheartening, it doesn't have to spell the end of your adventure. By understanding the challenges, implementing these urgent fixes, and committing to thorough preparation, you can confidently face the Arctic's embrace. May your batteries be full, your lenses clear, and your frames filled with the celestial dance. Happy shooting!

Recommended Reading
- Unlocking Serenity: How to Find the World's Whitest Sand Beaches
- Protecting Profits: How to Stop Coral Reef Decline From Hurting Beach Tourism
- Mastering Ancient Food Research: 7 Steps for Authentic Culinary Tours
- 7 Steps: Guaranteeing Authenticity for Overseas Luxury Watch Buys
- 7 Solo Travel Pathways: Prevent Executive Burnout & Reignite Your Purpose

Your email address will not be published. Required fields are marked *