
How to evacuate a critically injured climber from a remote glacier?
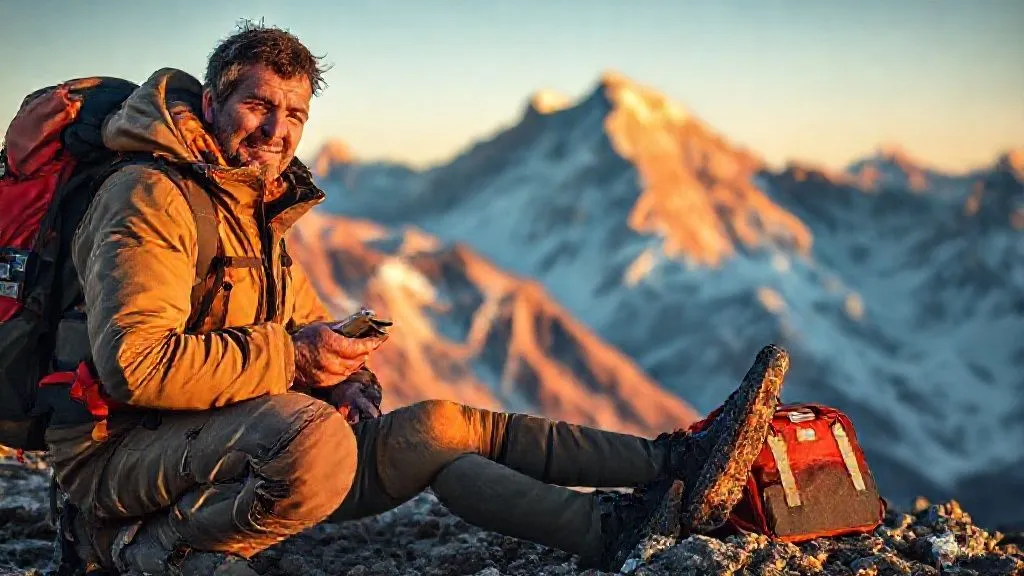
For over two decades navigating some of the world's most unforgiving alpine environments, I've witnessed firsthand the raw power and unpredictable nature of the mountains. There's a particular dread that settles in when a climbing partner goes down, especially on a vast, remote glacier where every minute counts, and external help feels a world away. I've been in situations where the line between a successful rescue and a tragic outcome was razor-thin, dictated by swift decisions, practiced skills, and an unwavering commitment to teamwork.
The challenge of a critically injured climber on a remote glacier isn't just about managing an injury; it's a complex, multi-faceted logistical nightmare compounded by extreme weather, treacherous terrain, and the crushing weight of isolation. It tests not only your medical knowledge but your leadership, your technical proficiency, and your mental fortitude. The stakes couldn't be higher, and complacency is a luxury no one can afford.
This definitive guide isn't just a collection of facts; it's a distillation of hard-won experience, designed to equip you with the actionable frameworks, critical decision-making processes, and expert insights needed to navigate the terrifying reality of a remote glacier evacuation. We'll delve into immediate stabilization, communication strategies, technical transport, and the crucial role of external rescue agencies, ensuring you're as prepared as possible when faced with the ultimate mountaineering emergency: **how to evacuate a critically injured climber from a remote glacier?**
Understanding the Unique Challenges of Glacier Evacuation
Evacuating a critically injured climber from a remote glacier presents a unique crucible of challenges that differentiate it from other wilderness rescues. The environment itself is a formidable adversary. You're often operating at high altitudes, where thin air saps strength and exacerbates existing medical conditions. The vast, often featureless expanse of a glacier can disorient, and the constant threat of crevasses, hidden under snow bridges, demands meticulous route finding and rope management, even under duress.
Weather conditions can deteriorate rapidly, transforming a clear, calm day into a whiteout blizzard in mere hours, making visibility zero and hypothermia an immediate threat. Resources are inherently limited; you're carrying everything you need on your back, and resupply is virtually impossible. Moreover, communication can be patchy or non-existent, delaying the call for external help and isolating your team further. All these factors amplify stress, demanding clear thinking, precise execution, and a deep understanding of your team's capabilities.
Expert Insight: "In remote glacier environments, the 'golden hour' for trauma care often stretches into days. Your ability to stabilize, protect, and improvise effectively is paramount, as professional medical help may be hours, or even days, away."

Immediate On-Scene Assessment and First Aid Stabilization
The first few minutes after an incident are critical. Your immediate actions will dictate the casualty's chances of survival and inform every subsequent decision. As an experienced wilderness first responder, I always emphasize a systematic, calm approach, even when your adrenaline is surging. The priority is always to ensure scene safety first – are there objective hazards that could injure more team members? Only once the scene is safe can you approach the casualty.
Once safe, focus on the 'ABCs' – Airway, Breathing, Circulation – followed by a rapid trauma assessment. Look for obvious bleeding, signs of shock, and potential spinal injuries. Hypothermia is a constant and insidious threat on a glacier, so preventing further heat loss is paramount. Get the casualty out of the elements as much as possible, insulate them from the cold ground, and add layers.
Here's a critical checklist for immediate stabilization:
- Scene Safety: Assess for avalanche danger, crevasse fall risk, rockfall, or other immediate threats. Secure the area if necessary.
- Primary Assessment (ABCs): Check for responsiveness, open airway, adequate breathing, and a strong pulse. Address life-threatening issues immediately.
- Spinal Immobilization: If a fall or high-impact injury is suspected, manually stabilize the head and neck. Use improvised methods (e.g., backpacks, clothing) to maintain alignment if transport is necessary.
- Control Bleeding: Apply direct pressure to any significant bleeding wounds. Use sterile dressings if available.
- Shock Management: Keep the casualty warm, elevate their legs (if no spinal injury suspected), and manage pain.
- Hypothermia Prevention: Remove wet clothing, insulate from the ground (sleeping pad, rope coils), wrap in a bivy sack or sleeping bag, and provide warm, sugary drinks if conscious and able to swallow.
- Pain Management: Administer appropriate pain medication from your wilderness first aid kit.
| Assessment Step | Action | Priority |
|---|---|---|
| Scene Safety | Identify and mitigate immediate hazards | Highest |
| Primary Survey (ABCs) | Airway, Breathing, Circulation check and intervention | Life-Saving |
| Spinal Immobilization | Manual stabilization, improvised C-collar | Critical for trauma |
| Bleeding Control | Direct pressure, pressure dressing | Immediate |
| Hypothermia Prevention | Insulate, warm, shelter | Ongoing |
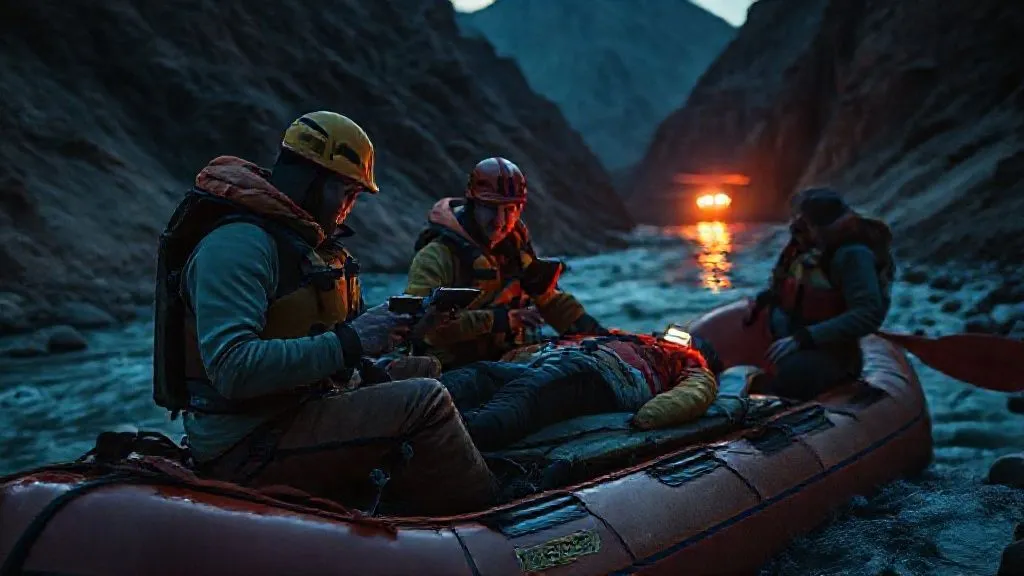
Establishing Communication and Calling for External Help
Once the casualty is stabilized, your next critical task is to establish communication with the outside world. On a remote glacier, this is rarely straightforward. You need a clear plan and the right tools. Your emergency communication device is your lifeline to professional search and rescue (SAR) teams, and knowing how to use it effectively can shave precious hours off a rescue timeline. Don't wait until an emergency to learn the nuances of your satellite phone or inReach.
When you make contact, be prepared to provide concise, accurate information: your exact GPS coordinates, the number of people in your party, the nature of the injury, the casualty's condition, environmental conditions (weather, terrain), and any immediate hazards. Be realistic about your capabilities and resources. SAR teams need this data to mobilize the appropriate resources, whether it's a helicopter, a ground team, or a combination.
- Satellite Phone: Offers two-way voice communication, but can be expensive and requires clear line of sight to satellites.
- Satellite Messenger (e.g., Garmin inReach, Zoleo): Provides two-way text communication and GPS tracking. Excellent for sending detailed messages and receiving updates.
- PLB/EPIRB: Personal Locator Beacons (PLB) or Emergency Position Indicating Radio Beacons (EPIRB) send a distress signal and your location to a global satellite network. One-way communication, but highly effective for alerting authorities.
- VHF Radio: Limited range but useful for line-of-sight communication with other parties or base camps if within range.
Case Study: The ‘Silent Glacier’ Incident
How a Coordinated Communication Plan Saved a Team
In 2018, a team of four climbers on a remote Alaskan glacier faced a severe leg fracture. Their satellite phone failed due to extreme cold. Thankfully, they had a Garmin inReach. Despite intermittent signal, they were able to send a detailed SOS message, including GPS coordinates and injury specifics. The local SAR was alerted. Crucially, the team had pre-programmed their emergency contacts and knew how to conserve battery life. They established a clear communication schedule, sending updates every two hours. This allowed SAR to track their progress and coordinate a helicopter insertion window during a brief weather break, saving critical time and ensuring the injured climber was evacuated within 24 hours, despite the extreme remoteness and challenging conditions. This highlights the indispensable value of redundant communication systems and clear protocols.

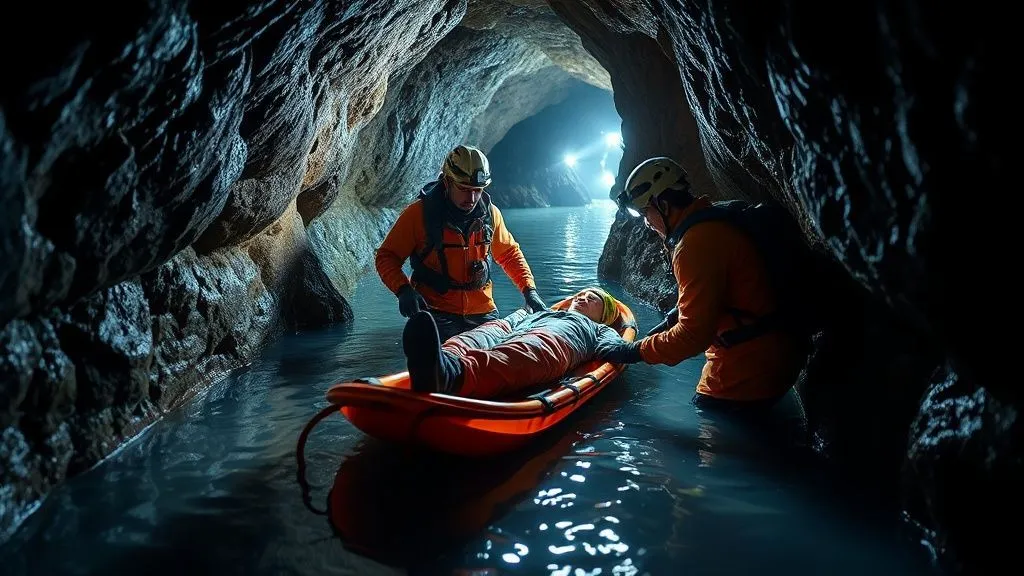
Preparing the Casualty for Transport: Packaging and Protection
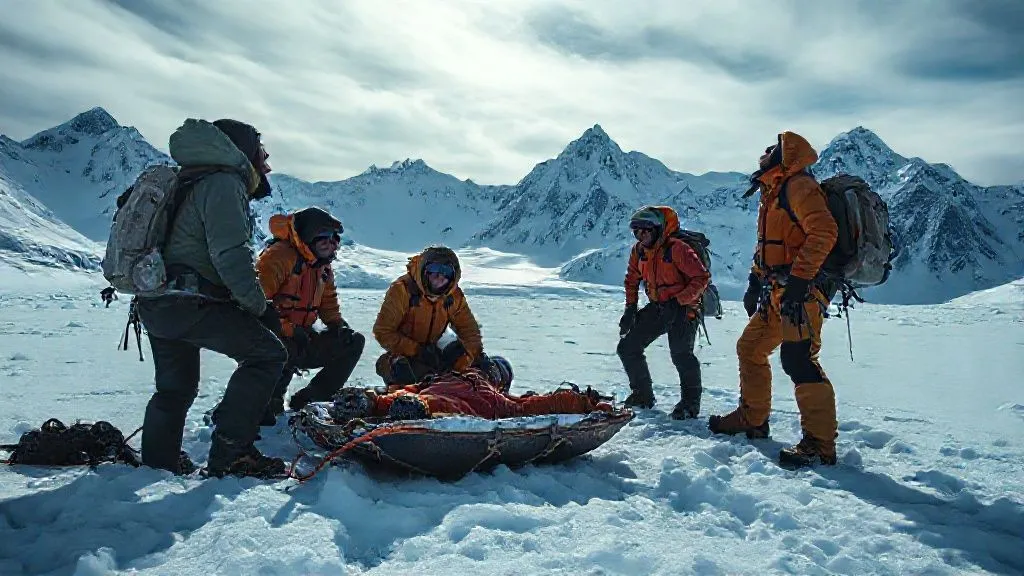
Once external help is on its way, or if self-evacuation is the only option, preparing the casualty for transport is paramount. This phase focuses on packaging the injured climber to prevent further injury, maintain stability, and protect them from the harsh environment. On a glacier, this often means constructing an improvised sled or litter.
The primary goals of packaging are: immobilization, insulation, and protection. For suspected spinal injuries, a rigid backboard is ideal, but in remote settings, a vacuum mattress or even a well-constructed improvised splint using sleeping pads, skis, or poles can provide adequate support. The casualty must be fully insulated; a sleeping bag, bivy sack, and even a tent fly can create a micro-climate to combat hypothermia. Think layers, and think about sealing off any drafts. Their face should be protected from wind and sun.
- Spinal Immobilization: If a spinal injury is suspected, ensure proper manual stabilization throughout the packaging process. Use gear like sleeping pads, backpacks, and rope to create a rigid, full-body splint if a dedicated spine board isn't available.
- Insulation: Wrap the casualty thoroughly in a sleeping bag, emergency bivy, and extra clothing. Place insulation (sleeping pads, rope coils) between them and the sled/ground.
- Protection from Elements: Use a tent fly, tarp, or bivy sack to shield them from wind, snow, and sun. Ensure their face is covered but breathing is unobstructed.
- Secure to Sled/Litter: Once packaged, carefully transfer the casualty to your improvised sled or dedicated litter. Use plenty of webbing, slings, or rope to secure them firmly, preventing movement during transport. Pad all pressure points.
- Monitor: Continuously monitor their vital signs and overall condition throughout the packaging process.
Technical Evacuation Strategies: Sledding, Hauling, and Lowering
When professional rescue is delayed or impossible, your team must be prepared for self-evacuation, which often involves technical sledding, hauling, or lowering systems. This is where your mountaineering and technical rescue skills truly come into play. On a glacier, a 'Sked' stretcher or a purpose-built rescue sled is ideal, but more often than not, you'll be improvising with skis, sleeping pads, and ropes.
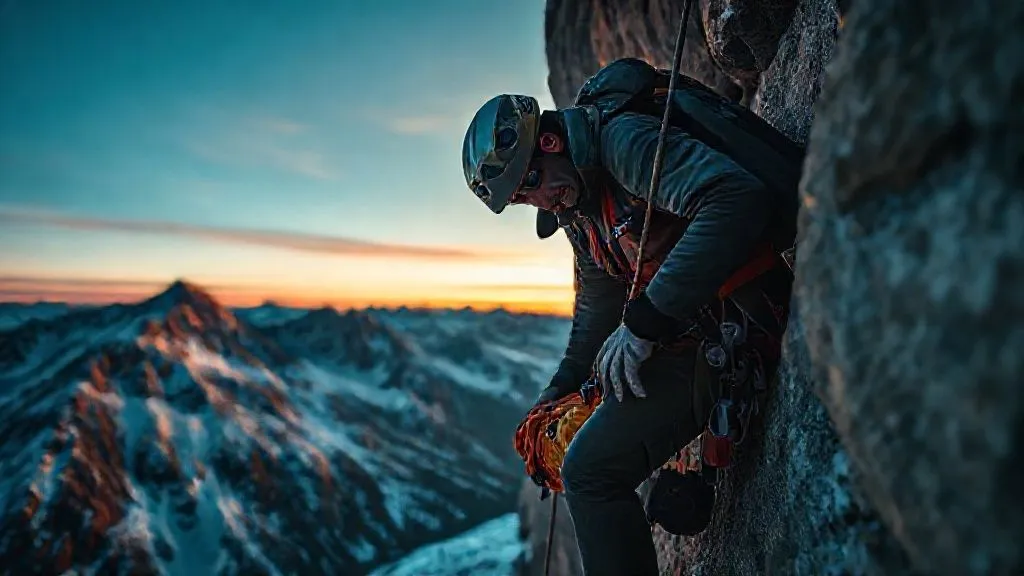
For sledding across relatively flat glacier terrain, a multi-person pull system is necessary. Depending on the terrain, you might need 3-6 people to pull a sled effectively. For ascending slopes or hauling out of a crevasse, a mechanical advantage system (like a Z-drag or C-haul) will be indispensable. These systems, utilizing pulleys and prusiks, multiply your team's pulling power significantly. For descents, especially over icefalls or steep sections, a controlled lowering system using anchors, ropes, and belay devices is critical. Each of these techniques requires practiced proficiency, strong anchors, and clear communication within the team.
 across a snow-covered glacier. The climbers are roped together, and their faces show determination and effort. Distant mountains loom under a clear, cold sky.")
Expert Insight: "An improvised sled system, even a basic one, is a game-changer for moving an injured climber. Practice building one with your team's standard gear before you ever need it in an emergency. The efficiency gained will be invaluable."
The Critical Role of Helicopter Rescue and Coordination
In many remote glacier evacuation scenarios, a helicopter represents the fastest and safest means of transport for a critically injured climber. However, coordinating a helicopter rescue is a complex operation that requires precise communication, clear understanding of capabilities, and strict adherence to safety protocols. When you're dealing with **how to evacuate a critically injured climber from a remote glacier** via air, every detail matters.
Your primary role is to prepare a safe landing zone (LZ) or hoist site. This means clearing the area of loose snow, marking it clearly (using brightly colored gear, not people as markers), and ensuring it's free of overhead obstructions (power lines, steep slopes, high winds). Communicate wind direction and speed to the pilot if possible. Once the helicopter is on approach, everyone on the ground must remain low, secure all loose gear, and follow the pilot's instructions implicitly. Never approach a helicopter without explicit permission from the crew. Understanding the hand signals used by rescue personnel can also be incredibly helpful.
- Landing Zone (LZ) Selection: Choose a flat, firm area at least 100x100 feet, free of obstructions. Consider wind direction for approach and departure.
- Marking the LZ: Use backpacks, skis, or brightly colored clothing to define the corners of the LZ. Avoid using people as markers.
- Wind Direction: Provide wind direction and speed to the pilot if possible (e.g., using a flag or throwing light snow).
- Safety Perimeter: All personnel and loose gear must be well outside the LZ during approach and landing/hoisting. Keep a sharp lookout for flying debris.
- Communication with Crew: Use clear, concise radio communication. Answer all questions directly. Follow all instructions given by the pilot or crew.

Post-Evacuation Care and Debriefing
Once the critically injured climber has been successfully evacuated from the remote glacier and is in professional medical care, your immediate crisis may be over, but the work isn't entirely done. The post-evacuation phase is crucial for both the casualty's long-term recovery and the mental well-being of the rescue team. For the casualty, ensuring a smooth transition to definitive medical care, providing accurate information to medical staff, and supporting their family are paramount.
For the team, a thorough debriefing is essential. This isn't about blame; it's about learning. Review what went well, what could have been done better, and what lessons were learned. This process helps solidify best practices and identifies areas for future training. Crucially, acknowledge the psychological toll such an event can take. Witnessing or participating in a critical incident can lead to stress, anxiety, or even PTSD. Encourage open communication and ensure team members have access to psychological support if needed. The shared experience, though traumatic, can also forge incredibly strong bonds.
According to research published by the Wilderness Medical Society, psychological first aid and critical incident stress debriefing are vital components of any successful rescue operation, extending far beyond the immediate physical evacuation. Ignoring the mental impact on rescuers is a critical oversight.
Prevention and Preparedness: The Best Defense
While knowing **how to evacuate a critically injured climber from a remote glacier** is vital, the best defense against such a scenario is prevention and thorough preparedness. As an industry veteran, I've seen countless incidents that could have been mitigated or avoided entirely with better planning, training, and equipment. Preparedness isn't just about having the right gear; it's about having the right mindset, the right skills, and a cohesive, well-drilled team.
Comprehensive wilderness medicine training (like a WFR or WEMT course) is non-negotiable for anyone venturing into remote alpine environments. Technical rescue skills, including crevasse rescue, improvised litter construction, and mechanical advantage systems, must be practiced regularly. Your gear should be meticulously maintained, suitable for the conditions, and include redundant communication and first-aid supplies. Route planning should always incorporate contingency plans for adverse weather or injury, identifying potential bail-out options and safe zones.
- Advanced Training: Invest in Wilderness First Responder (WFR) or Wilderness EMT (WEMT) certifications. Regularly practice technical rescue skills.
- Quality Gear: Ensure all equipment is appropriate for the environment, well-maintained, and includes essential emergency redundancies (e.g., multiple communication devices, extensive first-aid kit).
- Contingency Planning: Develop detailed 'what-if' scenarios for every trip. Identify escape routes, emergency shelters, and communication protocols.
- Team Dynamics: Cultivate strong team communication, trust, and shared decision-making. Understand each team member's strengths and weaknesses.
- Physical & Mental Fitness: Ensure all team members are adequately fit for the demands of the expedition and mentally prepared for potential challenges.
As the National Outdoor Leadership School (NOLS) consistently emphasizes, risk management is an ongoing process, not a one-time checklist. It involves continuous assessment, adaptation, and a proactive approach to safety.
Frequently Asked Questions (FAQ)
Question? What's the most common mistake people make during a remote glacier evacuation?
The most common mistake is often a lack of initial scene assessment and proper stabilization. Panicking and trying to move the casualty too quickly without addressing life threats or protecting them from the environment can worsen their condition. Another frequent error is poor communication – either not having a reliable device or providing unclear information to SAR.
Question? How do I improvise a sled if I don't have skis?
While skis are ideal, you can improvise a basic sled using sleeping pads, a tent fly, and trekking poles. Lay out two sleeping pads side-by-side, place the casualty on them, then wrap them tightly in a tent fly or tarp. Use trekking poles inserted into loops or tied onto the sides as 'runners' to keep the pads stiff and help them glide. Secure the casualty firmly with rope or webbing, and create a strong pulling bridle. It won't be as efficient as a dedicated sled, but it can be effective for short distances.
Question? What should be in my emergency medical kit specifically for glacier travel?
Beyond standard first aid, a glacier-specific kit should include robust pain management (prescription-strength if possible and legal), medications for altitude sickness, extensive wound care supplies, SAM splints, a large emergency blanket/bivy, a small repair kit for gear, and extra insulation. Consider a vacuum mattress if your group size and objective allow for the weight. Hypothermia prevention items are critical. For more detailed information, consult resources from the American Mountain Guides Association (AMGA) or WMI.
Question? How do I manage team morale and stress during a prolonged rescue?
Leadership is key. Maintain clear communication, assign specific tasks to keep everyone engaged, and encourage short breaks for food, water, and rest. Acknowledge the difficulty of the situation but project confidence and determination. Focus on small, achievable goals. Encourage team members to share concerns, and ensure everyone understands the plan. Remind them of the importance of their role in the bigger picture.
Question? What are the legal implications if I attempt a rescue and something goes wrong?
This is a complex area and varies by jurisdiction. Generally, 'Good Samaritan' laws protect individuals who render aid in an emergency, as long as they act in good faith and without gross negligence. However, if you are acting as a professional guide or outfitter, your duty of care is higher. It's always wise to understand the laws in the region you're traveling and to carry appropriate liability insurance if you're leading trips. Consult with a legal professional or your guiding association for specific advice.
Key Takeaways and Final Thoughts
- Prioritize Scene Safety & Immediate Stabilization: Address life threats and prevent further injury and heat loss before anything else.
- Master Communication: Redundant devices and clear, concise messaging are your lifelines to external help.
- Be Resourceful: Learn to improvise sleds, splints, and shelter using your existing gear.
- Practice Technical Skills: Proficiency in hauling, lowering, and anchor building is non-negotiable for self-evacuation.
- Coordinate with SAR: Understand helicopter operations and prepare safe landing/hoist zones diligently.
- Debrief & Learn: Analyze every incident, support your team, and integrate lessons learned into future preparedness.
- Prevention is Paramount: Invest in training, quality gear, and meticulous planning to avoid critical incidents.
The mountains, particularly remote glaciers, demand respect, skill, and an unwavering commitment to preparedness. While we hope to never face the daunting challenge of **how to evacuate a critically injured climber from a remote glacier**, being equipped with this knowledge transforms hope into capability. It's a testament to the human spirit – the ability to rise to the occasion, to innovate under pressure, and to care for one another in the most extreme circumstances. Go forth, climb hard, and stay safe, but always, always be prepared.
Recommended Reading
- Suborbital Safety: 5 Pillars to Assure Ultra-Rich Clients' Trust
- 5 Smart Ways: Unearthing Hidden Street Art on Your Business Trip
- 5 Strategies: Designing Ethical Tours for Overcrowded Heritage Sites
- Unveiling the Truth: Are Safari Tents Truly Good for Cold-Weather Glamping?
- Mastering Self-Rescue: Your Ultimate Guide to Multi-Pitch Ice Climbs

Your email address will not be published. Required fields are marked *